
今回は、Docker動作しているSpringBootを、
ステップ実行するためのデバッグ設定メモとなります。
確認は、有償版のIntelliJを利用しています。
以下のJetBrainsが公開しているデバッグ実行サンプルを参考にしています。
目次
注意点 ※2023/8/15追記
IntelliJのUIが変更になり、一部こちらの記事通りに行かなくなっているようです。
主にデバッグ設定でDockerを指定する部分(Launch Docker Before Debug)が異なっているようですので、
上記のIntelliJ上での設定部分は、以下の公式の情報をご確認頂いた方が良いと思います。
https://www.jetbrains.com/help/idea/running-a-java-app-in-a-container.html
環境
- macOS:Big Sur 11.5.2
- Docker:20.10.12
- Docker Desktop:4.5.0 (74594)
- docker-compose:1.29.2, build 5becea4c
- IntelliJ(Ultimate Edition):2021.2.2
動作バージョン
- Java:Amazon Corretto 17
- SpringBoot:3.0.5
- Gradle:7.6
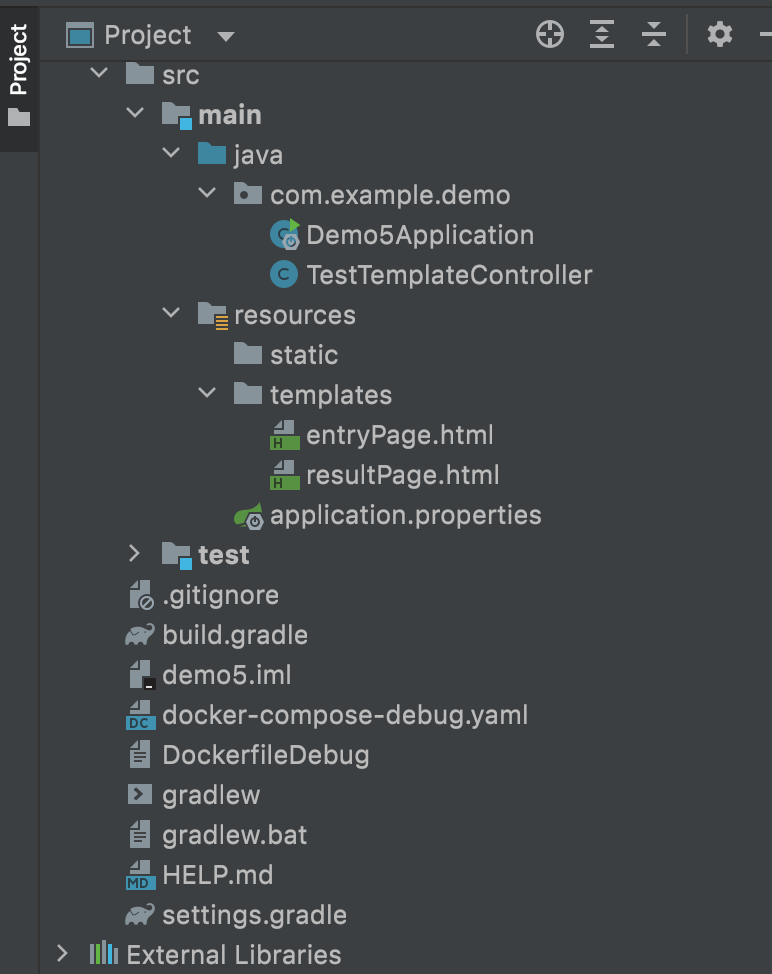
プロジェクト内容
動作確認用に、以下のような簡単なSpringBootプロジェクトを作成しました。
こちらを動かして確認してみます。
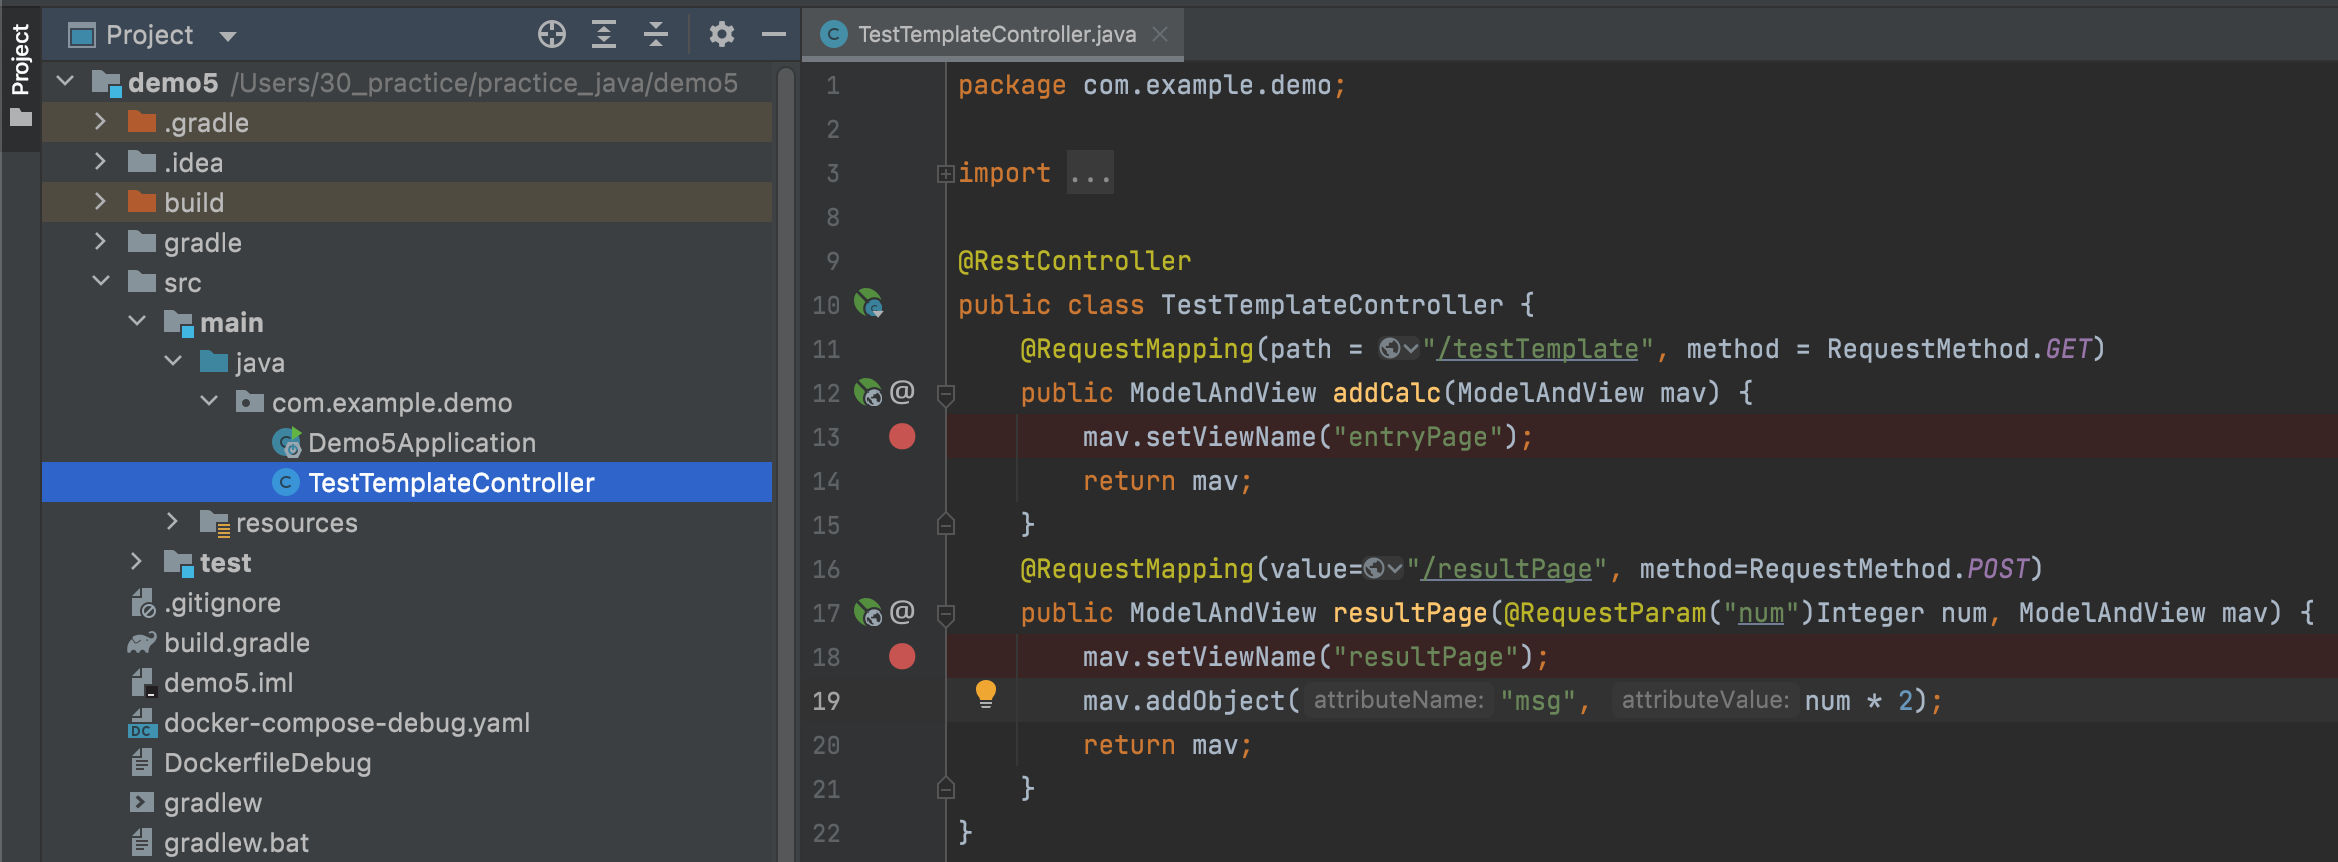
コントローラ クラス
package com.example.demo;

import org.springframework.web.bind.annotation.RequestMapping;
import org.springframework.web.bind.annotation.RequestMethod;
import org.springframework.web.bind.annotation.RequestParam;
import org.springframework.web.bind.annotation.RestController;
import org.springframework.web.servlet.ModelAndView;

@RestController
public class TestTemplateController {
    @RequestMapping(path = "/testTemplate", method = RequestMethod.GET)
    public ModelAndView addCalc(ModelAndView mav) {
        mav.setViewName("entryPage");
        return mav;
    }
    @RequestMapping(value="/resultPage", method=RequestMethod.POST)
    public ModelAndView resultPage(@RequestParam("num")Integer num, ModelAndView mav) {
        mav.setViewName("resultPage");
        mav.addObject("msg", num * 2);
        return mav;
    }
}
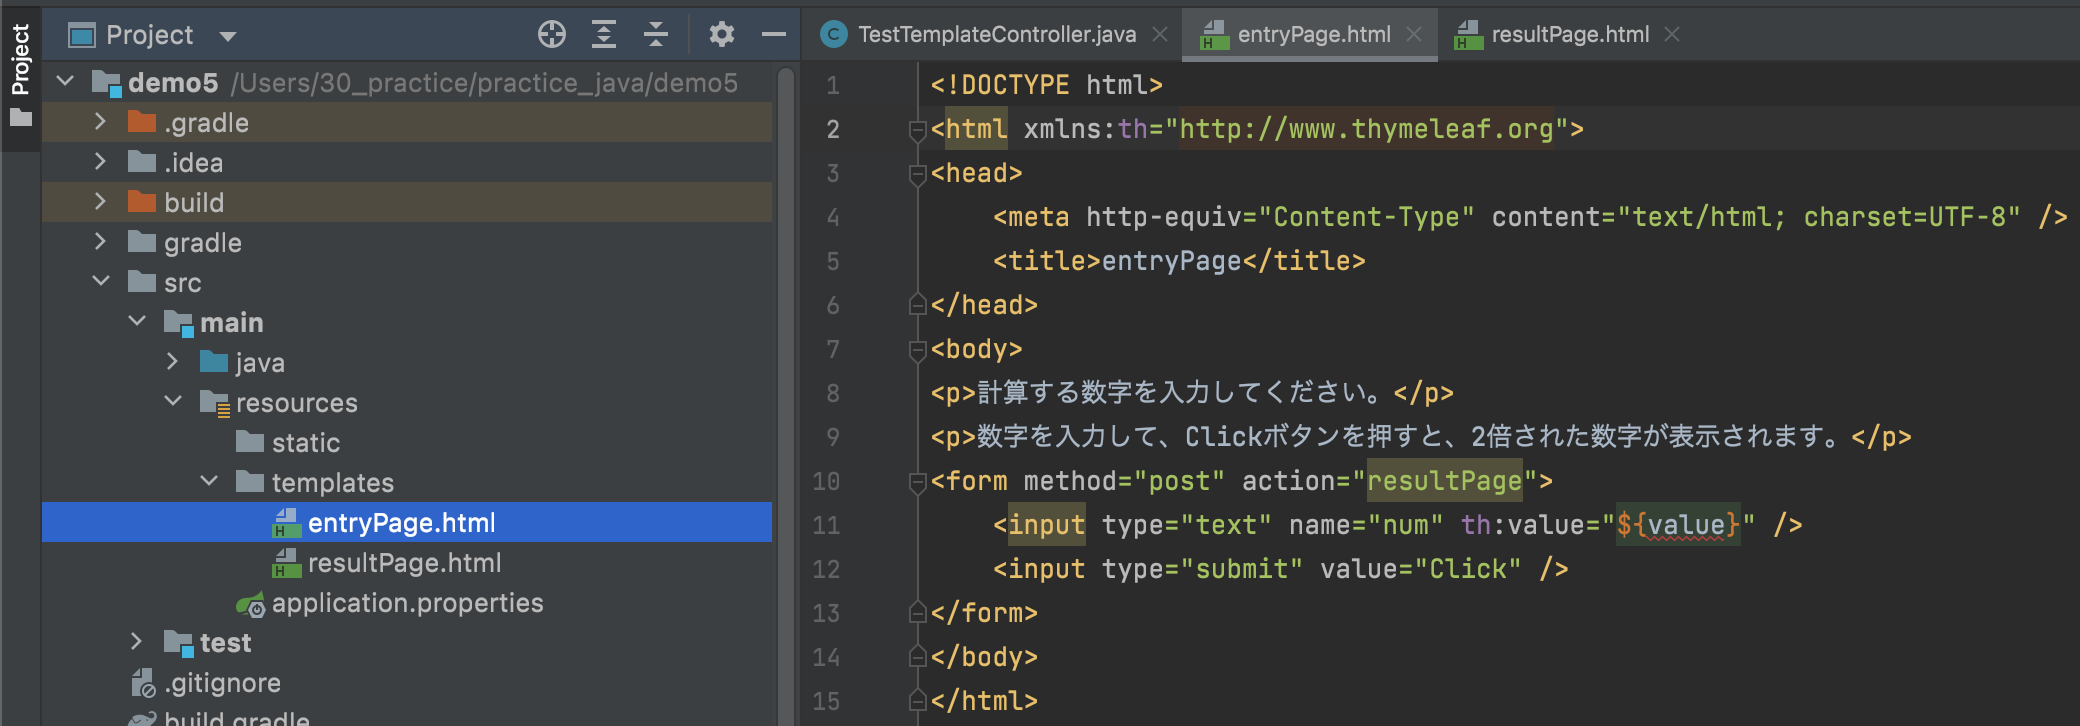
テンプレート<入力フォーム>
<!DOCTYPE html>
<html xmlns:th="http://www.thymeleaf.org">
<head>
    <meta http-equiv="Content-Type" content="text/html; charset=UTF-8" />
    <title>entryPage</title>
</head>
<body>
<p>計算する数字を入力してください。</p>
<p>数字を入力して、Clickボタンを押すと、2倍された数字が表示されます。</p>
<form method="post" action="resultPage">
    <input type="text" name="num" th:value="${value}" />
    <input type="submit" value="Click" />
</form>
</body>
</html>
テンプレート<結果画面>
<!DOCTYPE html>
<html xmlns:th="http://www.thymeleaf.org">
<head>
    <meta http-equiv="Content-Type" content="text/html; charset=UTF-8" />
    <title>resultPage</title>
</head>
<body>
resultPage<br>
<p th:text="${msg}">please wait...</p>
</body>
</html>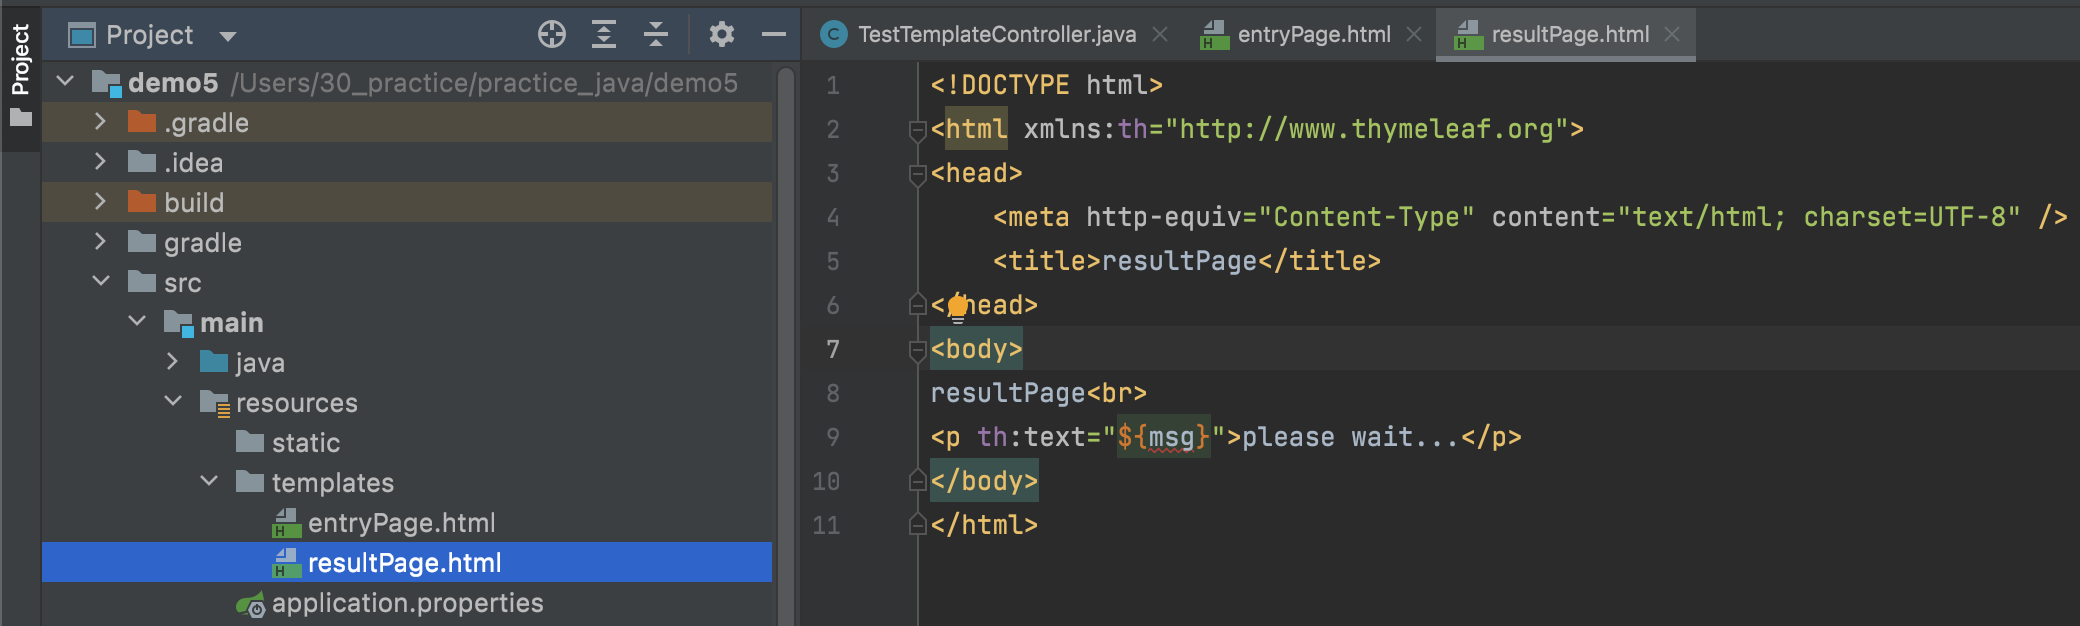
Dockerfile
FROM gradle:7.6.1-jdk17-focal

COPY ./src ./src
COPY ./build.gradle .
RUN gradle build

EXPOSE 8080
EXPOSE 5005 # デバッグ実行用ポート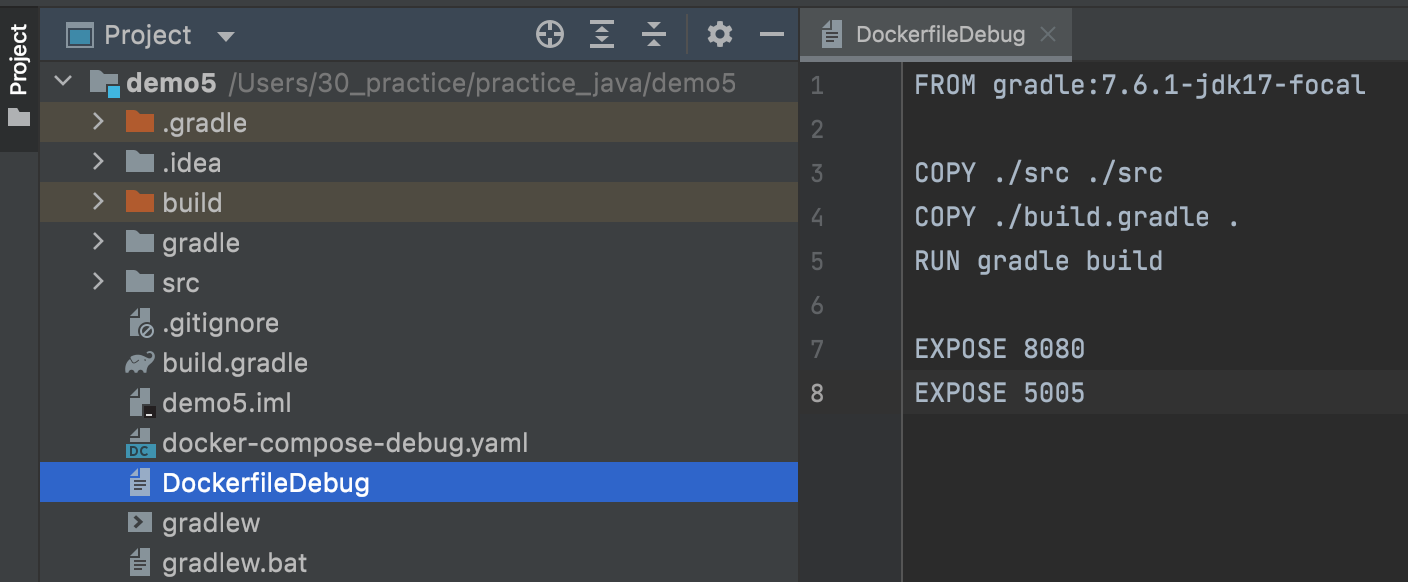
docker-compose.yaml
デバッグ用としてdocker-compose-debug.yamlという命名にしています。
docker-compose.yaml 以外の命名だと、コマンド実行時にファイル名指定 -f オプションが必要となります。
docker-compose -f docker-compose-debug.yaml buildversion: "3.6"
networks:
test_network:
services:
app:
build:
context: .
dockerfile: DockerfileDebug
ports:
- "28080:8080"
- "5005:5005" # デバッグ実行用

build.gradle
今回は、ビルドして生成されるjarの名前をapp.jarに指定しています。
bootJar {
 archiveFileName = 'app.jar'
}
また、Javaの実行メインクラスも指定しています。
plugins {
    id 'java'
    id 'org.springframework.boot' version '3.0.5'
    id 'io.spring.dependency-management' version '1.1.0'
}

group = 'com.example'
version = '0.0.1-SNAPSHOT'
sourceCompatibility = '17'

repositories {
    mavenCentral()
}

dependencies {
    implementation 'org.springframework.boot:spring-boot-starter-thymeleaf'
    implementation 'org.springframework.boot:spring-boot-starter-web'
    testImplementation 'org.springframework.boot:spring-boot-starter-test'
}

tasks.named('test') {
    useJUnitPlatform()
}

bootJar {
    archiveFileName = 'app.jar'
}

jar {
    manifest {
        attributes 'Main-Class': 'com.example.demo.Demo5Application'
    }
}
Docker デバッグ設定
まずは、設定前にDocker イメージのビルドを行います。
※こちらのメモではdocker-compose.yamlのファイル名を、docker-compose-debug.yamlと変更しているので、
-f オプション(ファイル名指定)を付与してコマンド実行しています。
docker-compose -f docker-compose-debug.yaml build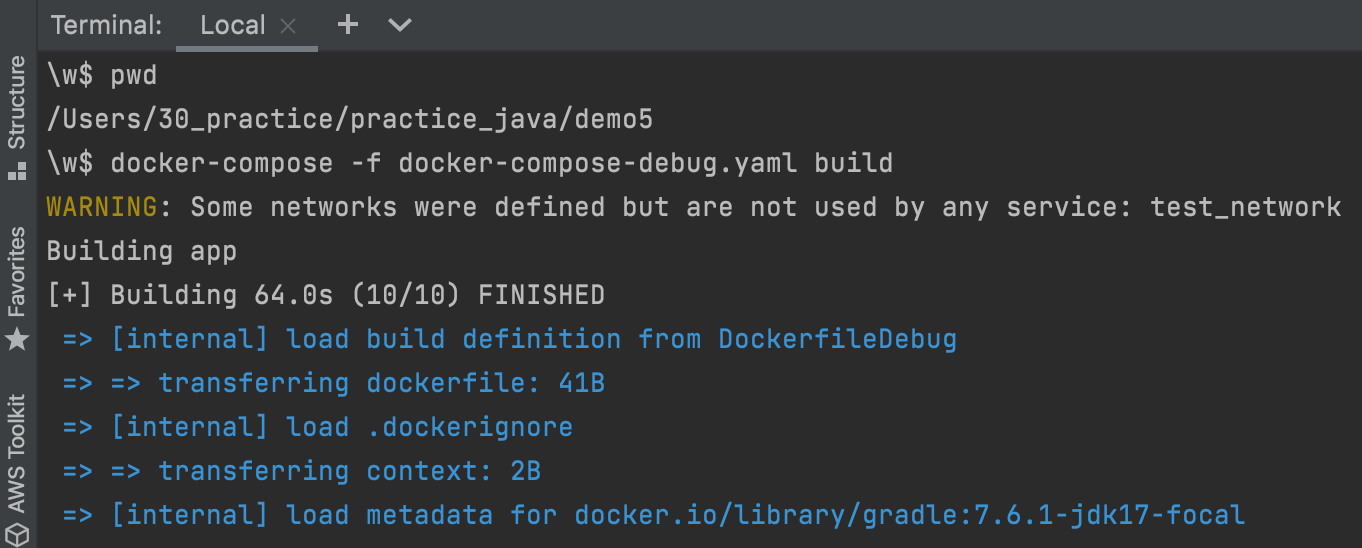
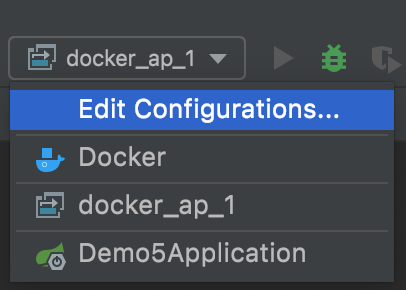
ビルドできたら、デバッグ設定を行なってデバッグ実行します。
Edit ConfigurationsよりRun/Debug Configurationsを開きます。
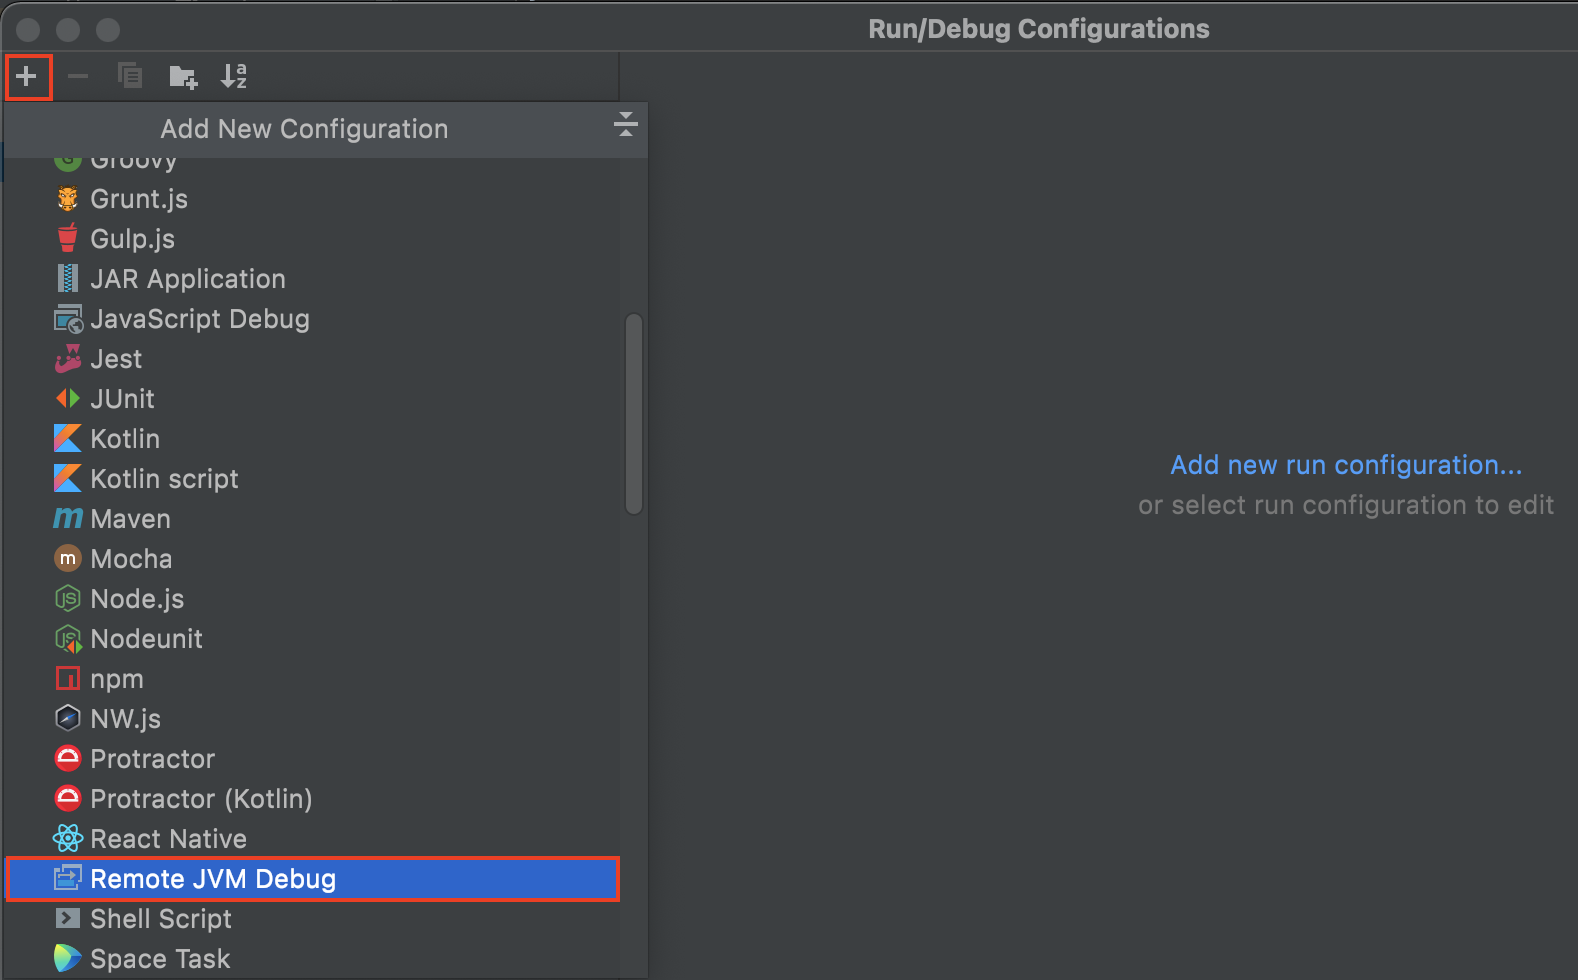
続けてプラスマークをクリックして、Add New ConfigurationよりRemote JVM Debugをクリックします。
設定画面が表示されたら、
Nameに識別用の任意の名称を入力し、

Use module classpathのところを、
プロジェクト名と同じ(プロジェクトルート)で選択します。

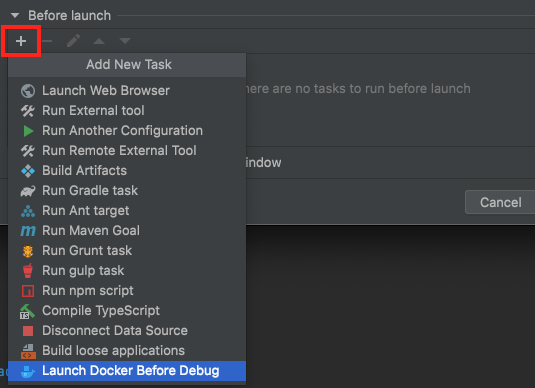
次にBefore launchのところのプラスマークをクリックして、
Add New Task内のLaunch Docker Before Debugをクリックします。
Configure Docker画面が開かれたら、まずServiceの部分をappに変更します。
変更方法は、Docker configurationのところをプルダウンメニューを開いて、Dockerをクリックします。

クリックするとappに変更されます。

続けて、Custom commandの内容を指定します。
していするには、右端のマークをクリックして、
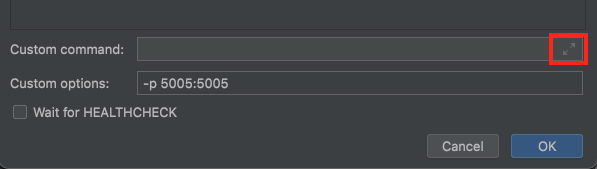
以下の内容を記述します。
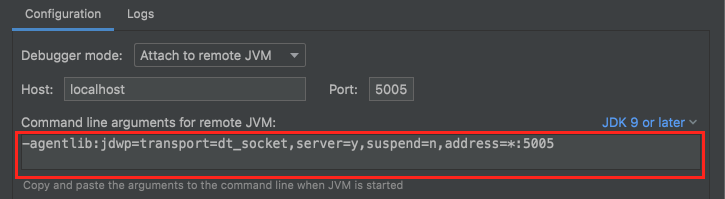
java -agentlib:jdwp=transport=dt_socket,server=y,suspend=n,address=*:5005 -Djava.security.egd=file:/dev/./urandom -jar build/libs/app.jarこちらの内容は、動作させるJavaバージョンによって記述方法が異なるようですので、
一つ前の画面のCommand line arguments for remote JVMの内容を参考にします。
JDK 9 or laterの部分でバージョンごとの内容に切り替えることができるようです。
記述したら、右端のマークをクリックして戻します。
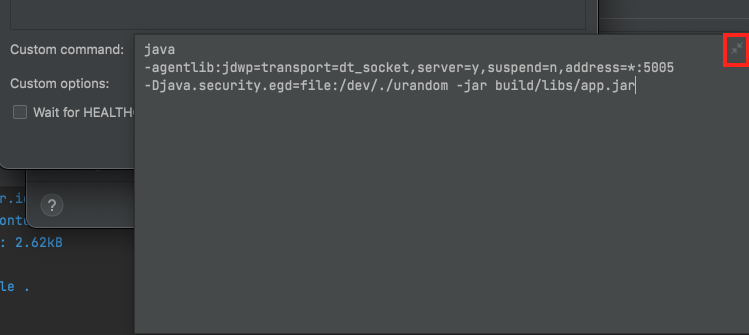
最終的に以下のような内容になります。
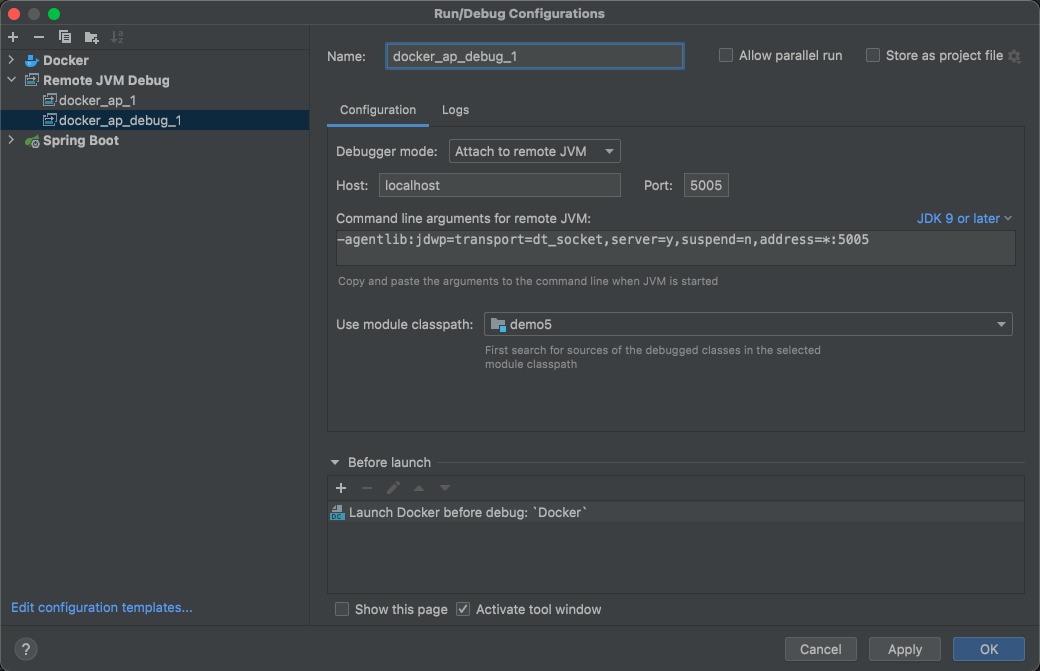
ここまで設定できたらOKボタンをクリックして設定を保存します。
保存された設定名が表示されます。
![]()
Docker コンテナ デバッグ実行
設定できたらデバッグ実行マークをクリックします。
![]()
コンテナが自動的に実行されて、

指定されているポートでコネクションが確立されます。

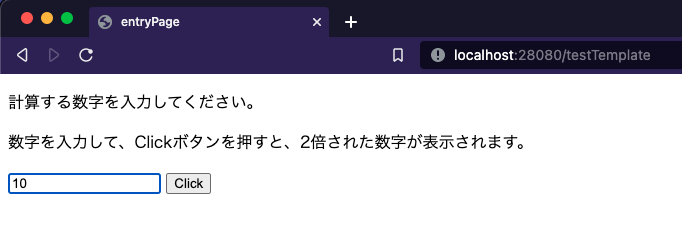
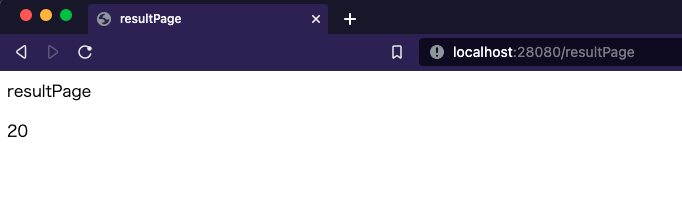
挙動確認
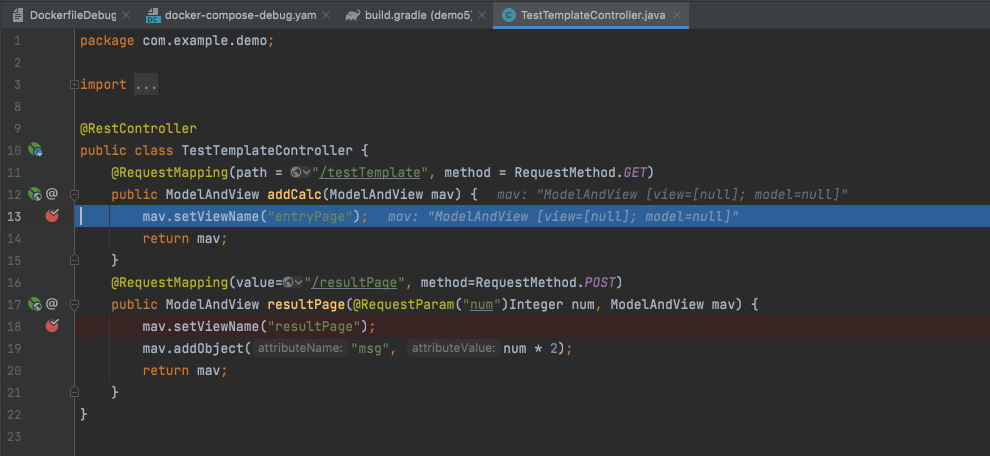
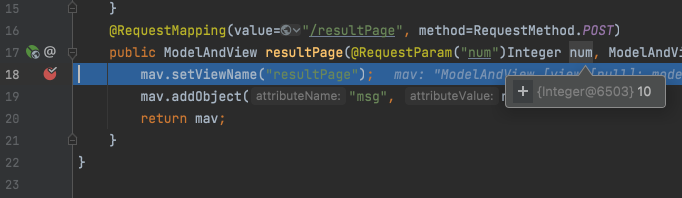
起動したら、ステップ実行させたいコードのところにブレークポイントを設置して実行してみます。
http://localhost:28080/testTemplate

ブレークポイントが設置された部分で、一時停止います。
Debugウィンドウのところで内容を確認したり、ステップ実行してみます。
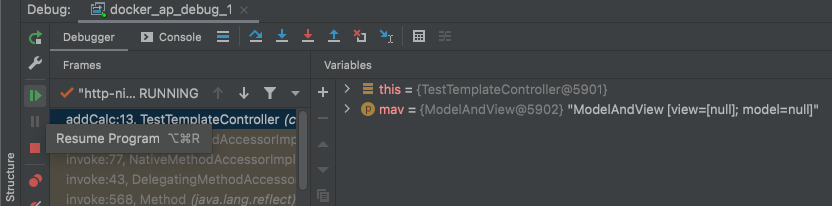
画面から渡された数値なども引数に受け取っていることを確認できます。
デバッグ実行停止させる場合は、赤い資格マークの停止ボタンで停止します。

尚、デバッグ実行を停止させても、コンテナの実行自体は停止しませんので、
コンテナは以下などで停止させます。
docker-compose -f docker-compose-debug.yaml down --volumes
今回のメモは以上となります。
今回のサンプルプロジェクトのファイルは、以下に公開中です。
https://drive.google.com/file/d/1-VltmqBUOecZPq3YiV75aI2xD1vz_PPQ/view?usp=sharing