
今回は、SpringBootでMySQLのデータを簡単なWebページに表示させるメモとなります。
SpringBoot JPAで、MySQLへの接続周りを実装します。
依存モジュールの管理は、Gradleを利用します。
MySQLはDockerで動作させる前提の内容になっていますが、
コンテナ動作のMySQLでなくても問題ないです。
1点注意点として、有償版のIntelliJ(Ultimate Edition)を利用した内容になっています。
無償版のIntelliJを使用する場合や、他のIDEを利用する場合は、
spring initializr(https://start.spring.io/)を利用する必要があります。
目次
環境
- macOS:Big Sur 11.5.2
- Docker:20.10.12
- Docker Desktop:4.5.0 (74594)
- docker-compose:1.29.2, build 5becea4c
- IntelliJ(Ultimate Edition):2021.2.2
動作内容
- Java:Amazon Corretto 17
- SpringBoot:3.0.5
- Gradle:7.6
- MySQL(Docker container):5.7.41-debian
プロジェクト作成
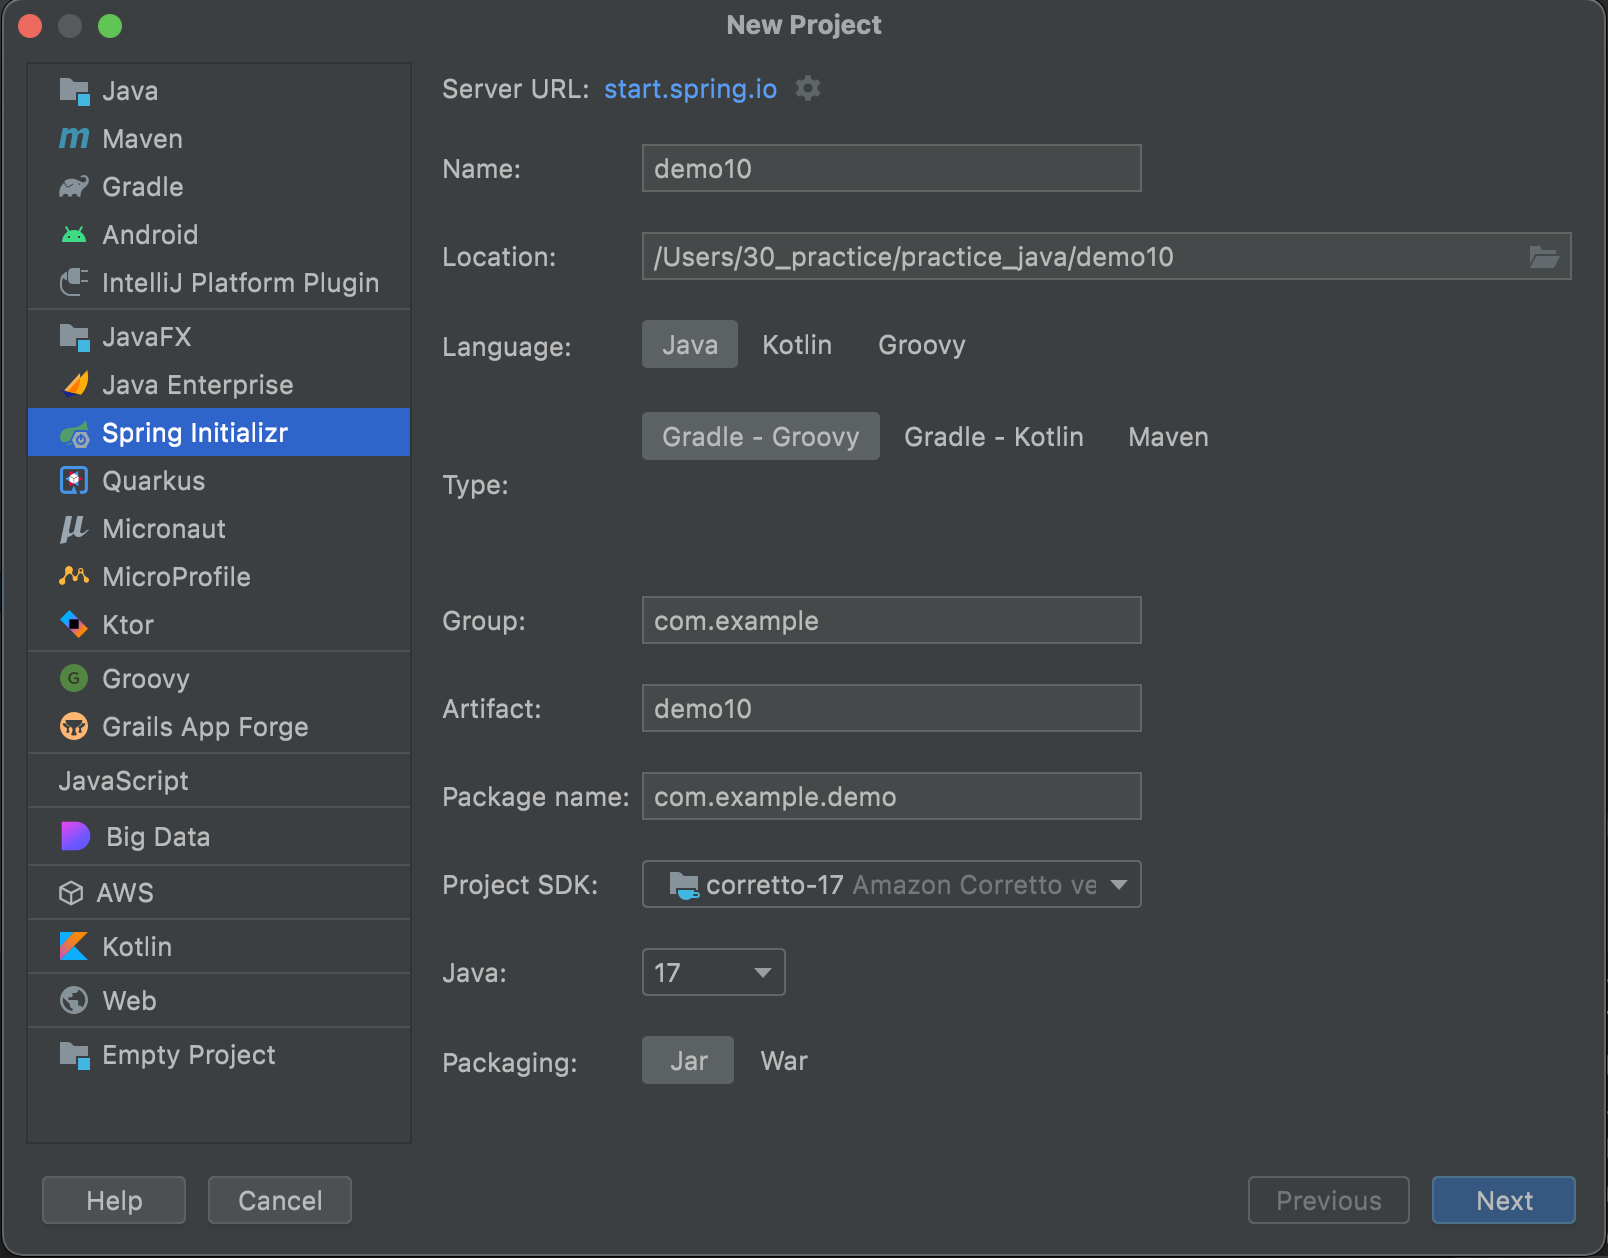
まずは、プロジェクト作成を行います。
有償版のIntelliJを使用しない場合、以下のSpring initializerを利用してください。
有償版のIntelliJを利用する場合、New Project -> Spring Initializrを選択します。
今回は、以下の内容で作成します。
Project SDKやJavaバージョンによって、後に登場する設定ファイルの内容が変更になる場合があります。
以下と異なる内容にする場合、必要に応じてbuild.gradleファイルを調整してください。
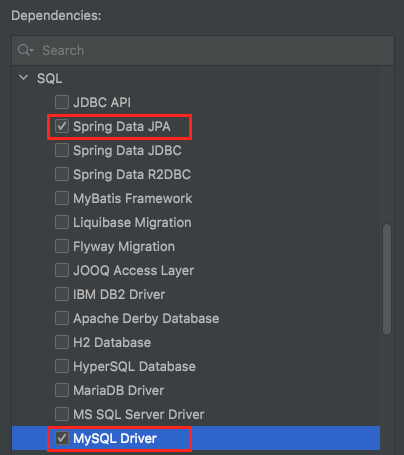
続けて、依存ライブラリの設定を行います。
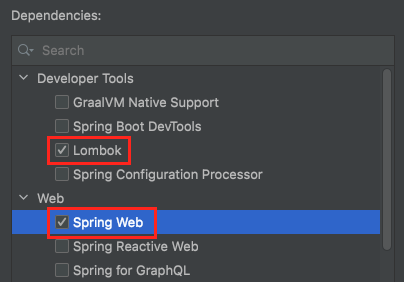
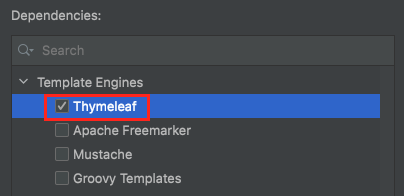
Dependenciesのところで、今回利用するものを選択します。
今回は、以下を選択しました。
- Spring Boot:3.0.5
- Spring Web
- Thymeleaf
- Spring Data JPA
- MySQL Driver
- Lombok
Lombokは無くても良いのですが、Getter・Setterなどの定型的なコードを、
アノテーション付与で利用出来る便利なライブラリのため、今回は利用します。
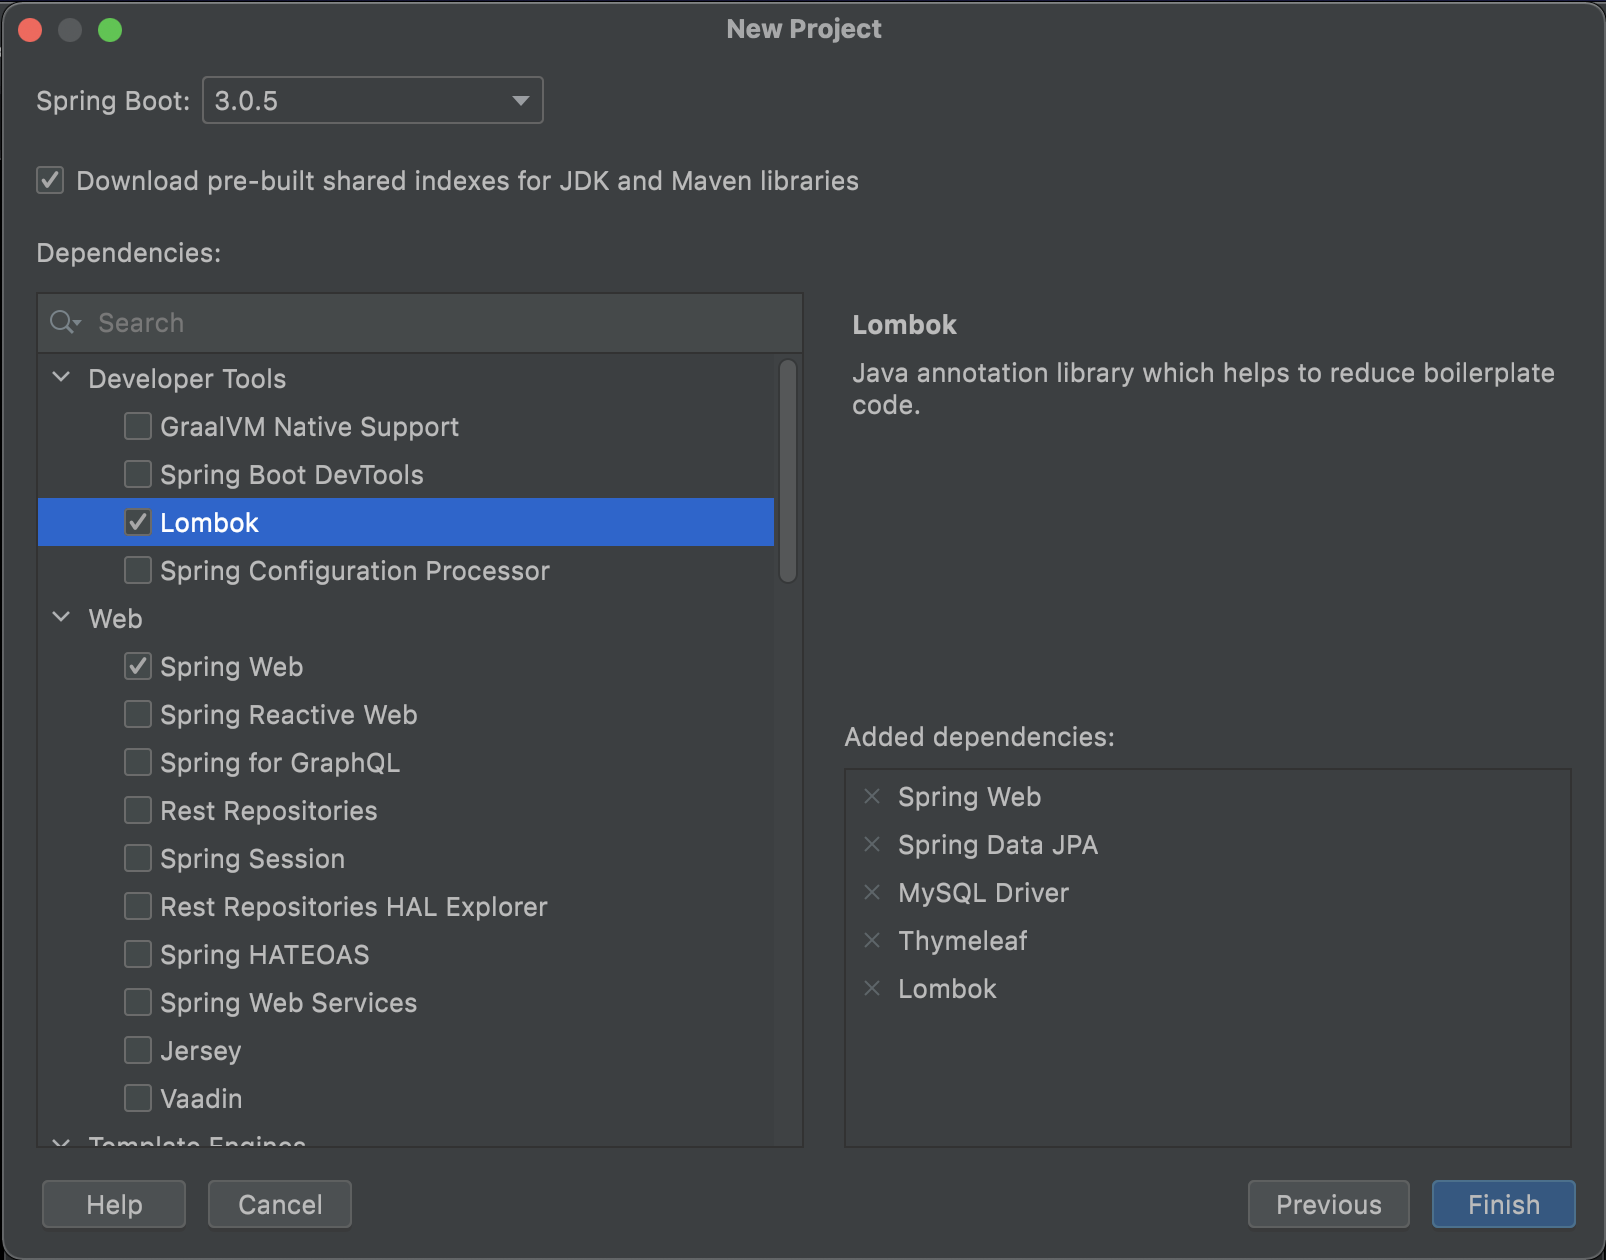
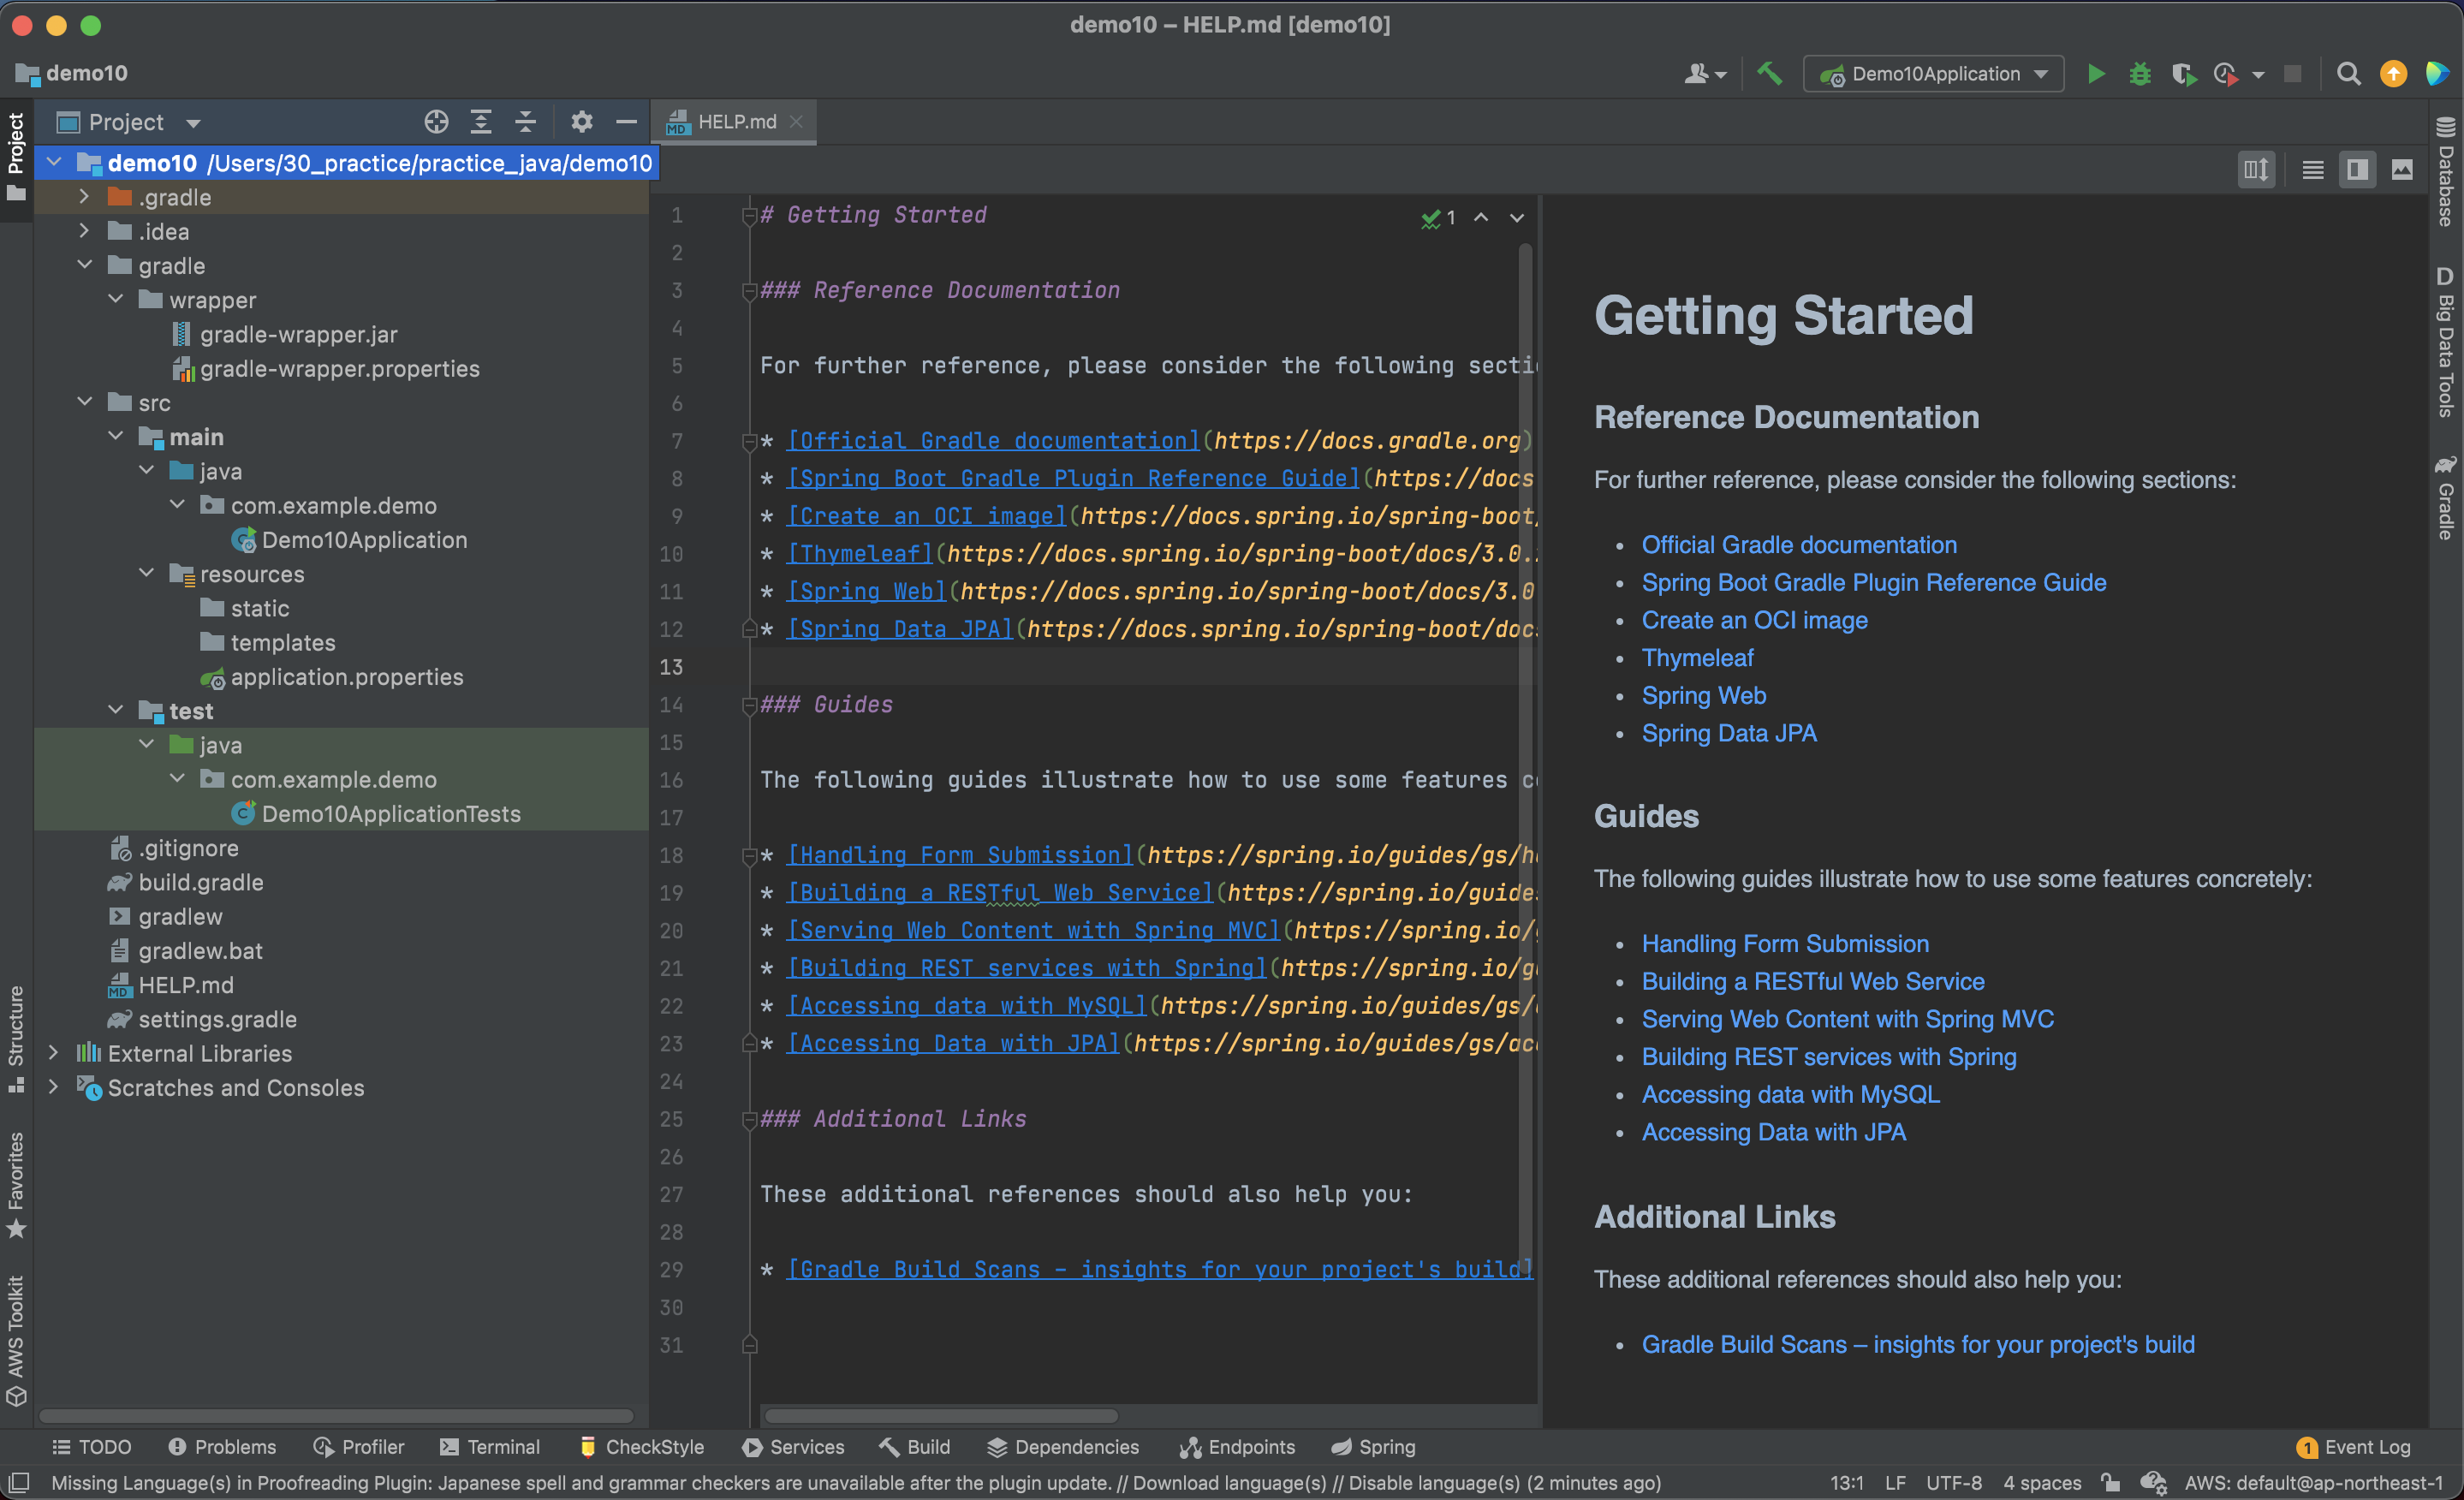
Finishボタンを押すと、プロジェクトが生成されます。
Gradle設定ファイル確認
自動生成されますが、念のため設定ファイルbuild.gradleの内容を確認します。
過不足があるとビルドエラーの要因となります。
plugins {
    id 'java'
    id 'org.springframework.boot' version '3.0.5'
    id 'io.spring.dependency-management' version '1.1.0'
}

group = 'com.example'
version = '0.0.1-SNAPSHOT'
sourceCompatibility = '17'

configurations {
    compileOnly {
        extendsFrom annotationProcessor
    }
}

repositories {
    mavenCentral()
}

dependencies {
    implementation 'org.springframework.boot:spring-boot-starter-data-jpa'
    implementation 'org.springframework.boot:spring-boot-starter-thymeleaf'
    implementation 'org.springframework.boot:spring-boot-starter-web'
    compileOnly 'org.projectlombok:lombok'
    runtimeOnly 'com.mysql:mysql-connector-j'
    annotationProcessor 'org.projectlombok:lombok'
    testImplementation 'org.springframework.boot:spring-boot-starter-test'
}

tasks.named('test') {
    useJUnitPlatform()
}
DB MySQL 準備
MySQLの準備を行います。
今回は、以下のメモと同じ内容で準備を行います。詳細は以下をご確認下さい。
(MySQLを利用できれば良いので、必ずこちらの内容でなくても問題ありません)
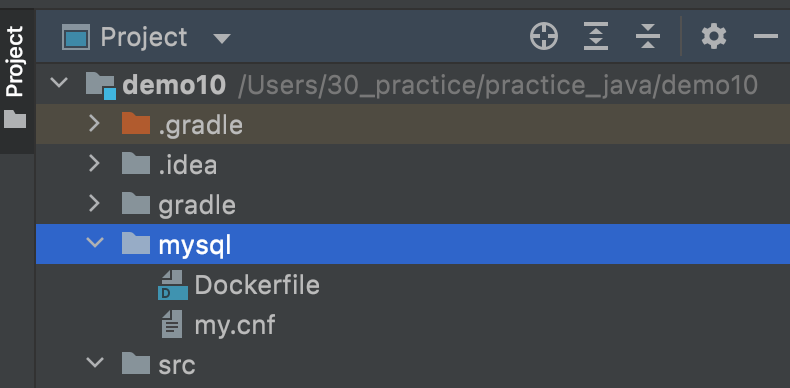
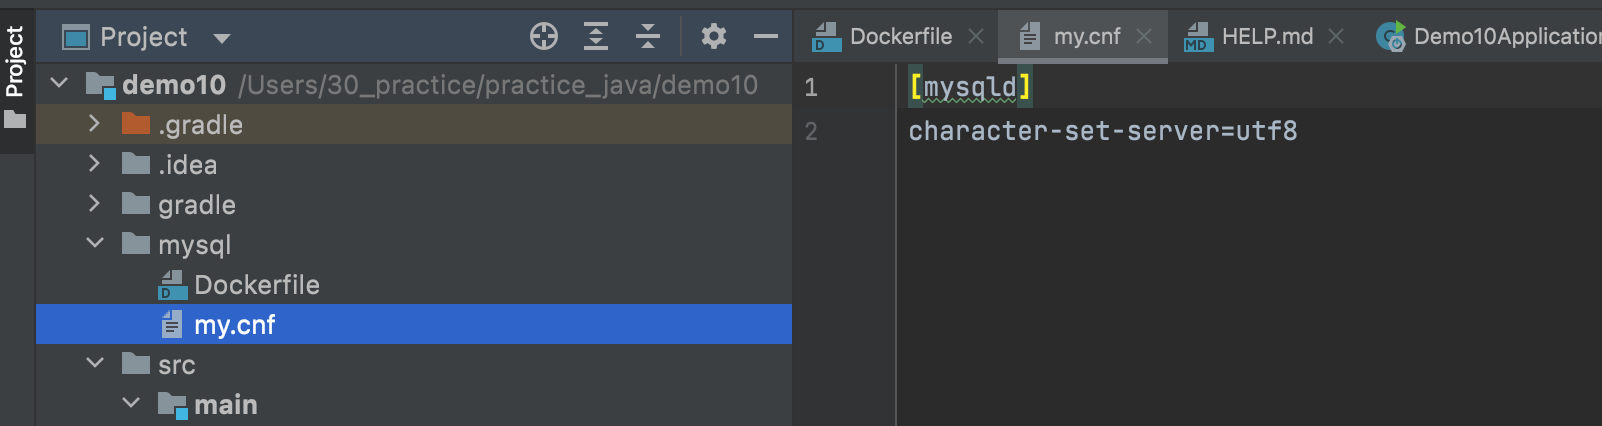
mysqlフォルダを作成して、Dockerfileとmy.cnfを用意します。
mysql/Dockerfile
FROM mysql:5.7.41-debian
COPY ./my.cnf /etc/mysql/conf.d/
RUN apt-get update
RUN apt-get install -y locales
RUN apt-get clean
RUN rm -rf /var/lib/apt/lists/*
RUN sed -i -E 's/# (ja_JP.UTF-8)/\1/' /etc/locale.gen && locale-gen
ENV LANG ja_JP.UTF-8
CMD ["mysqld", "--character-set-server=utf8", "--collation-server=utf8_unicode_ci"]
mysql/my.cnf
[mysqld]
character-set-server=utf8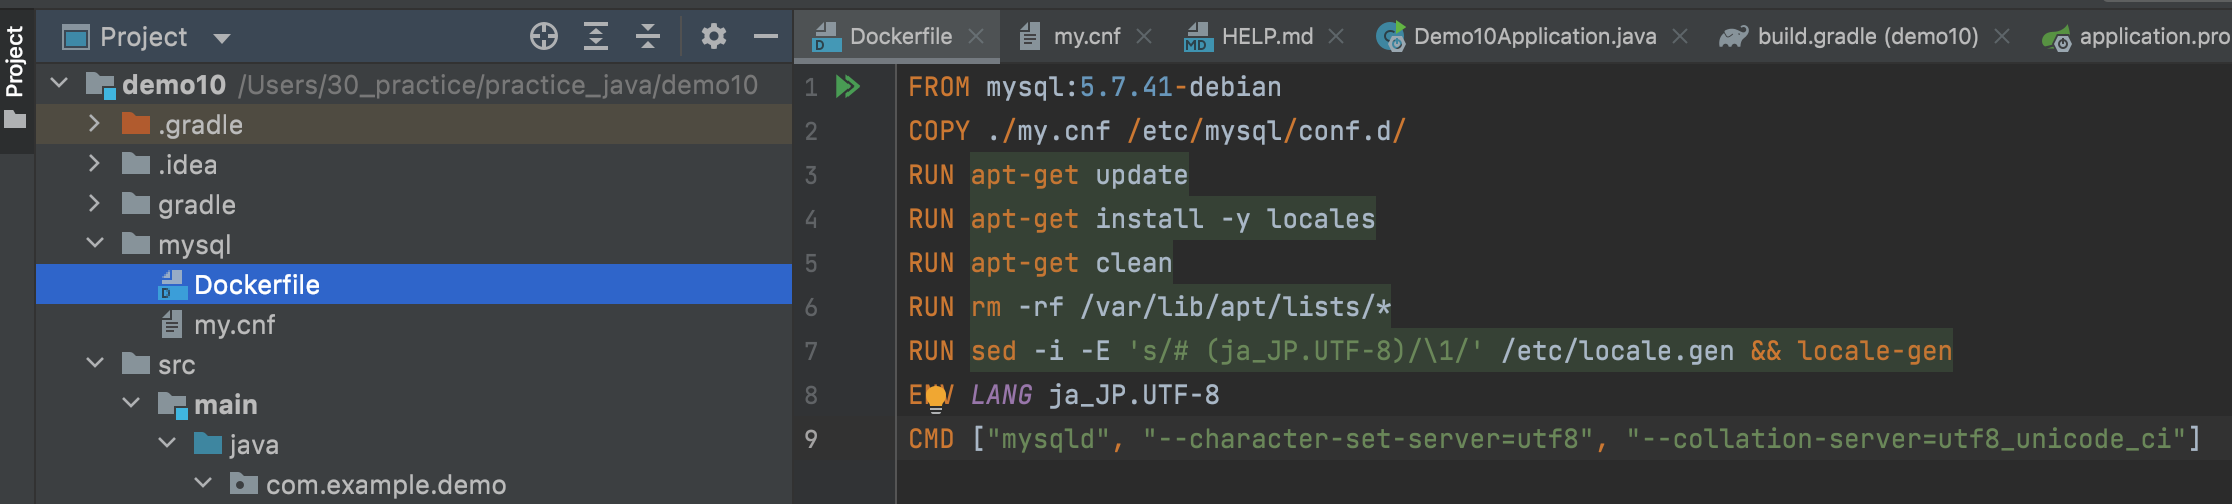
コンテナ起動
docker-compose up -d --build
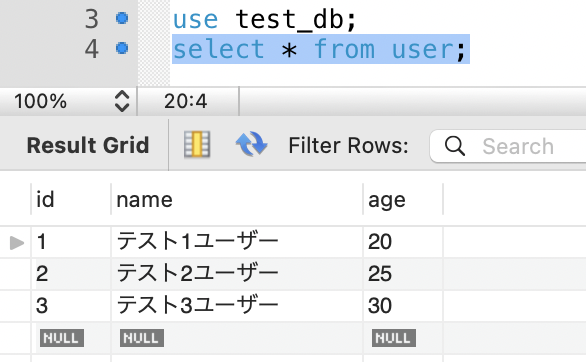
MySQLを起動して、以下のSQLを実行して、動作確認用のテーブルを作成・データ追加しておきます。
CREATE TABLE `test_db`.`user` (
`id` INT NOT NULL AUTO_INCREMENT,
`name` VARCHAR(100) NULL,
`age` INT NULL,
PRIMARY KEY (`id`),
UNIQUE INDEX `id_UNIQUE` (`id` ASC));
INSERT INTO `test_db`.`user` (`id`, `name`, `age`) VALUES ('1', 'テスト1ユーザー', '20');
INSERT INTO `test_db`.`user` (`id`, `name`, `age`) VALUES ('2', 'テスト2ユーザー', '25');
INSERT INTO `test_db`.`user` (`id`, `name`, `age`) VALUES ('3', 'テスト3ユーザー', '30');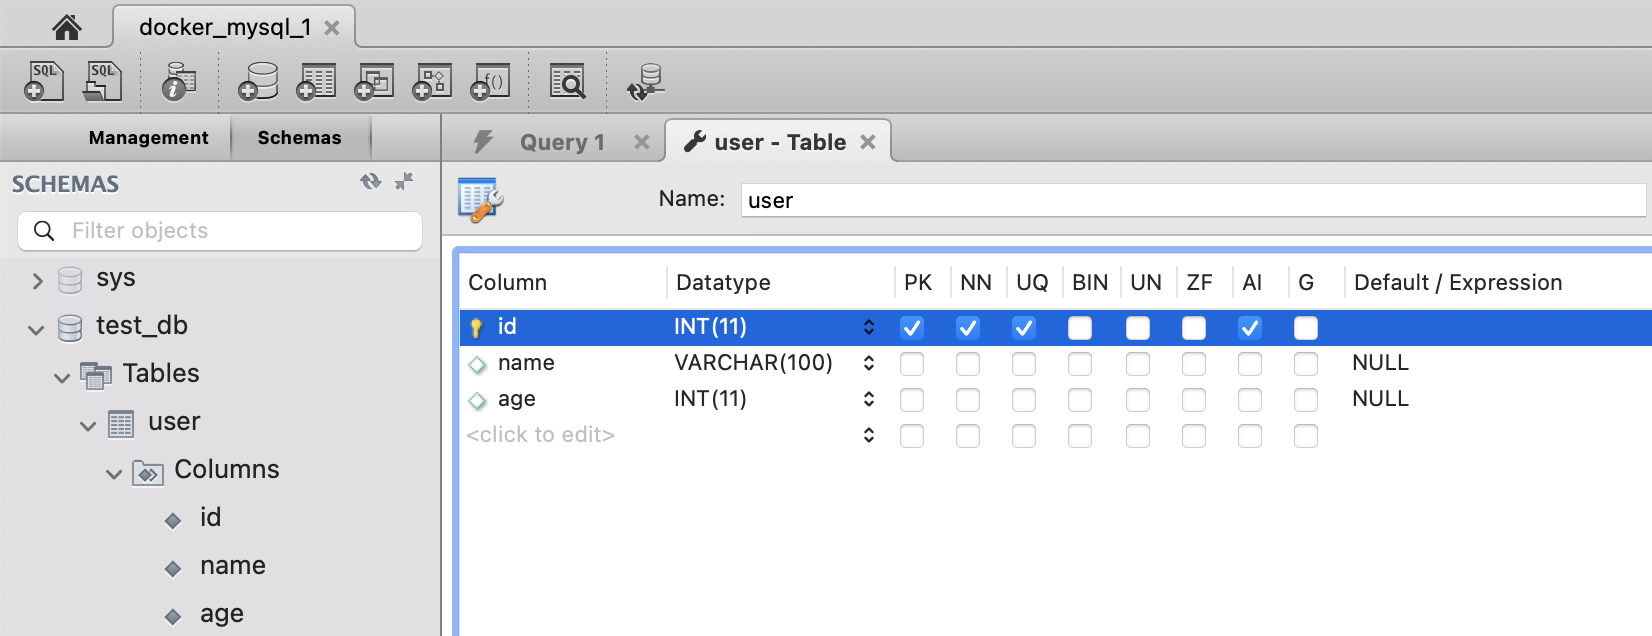
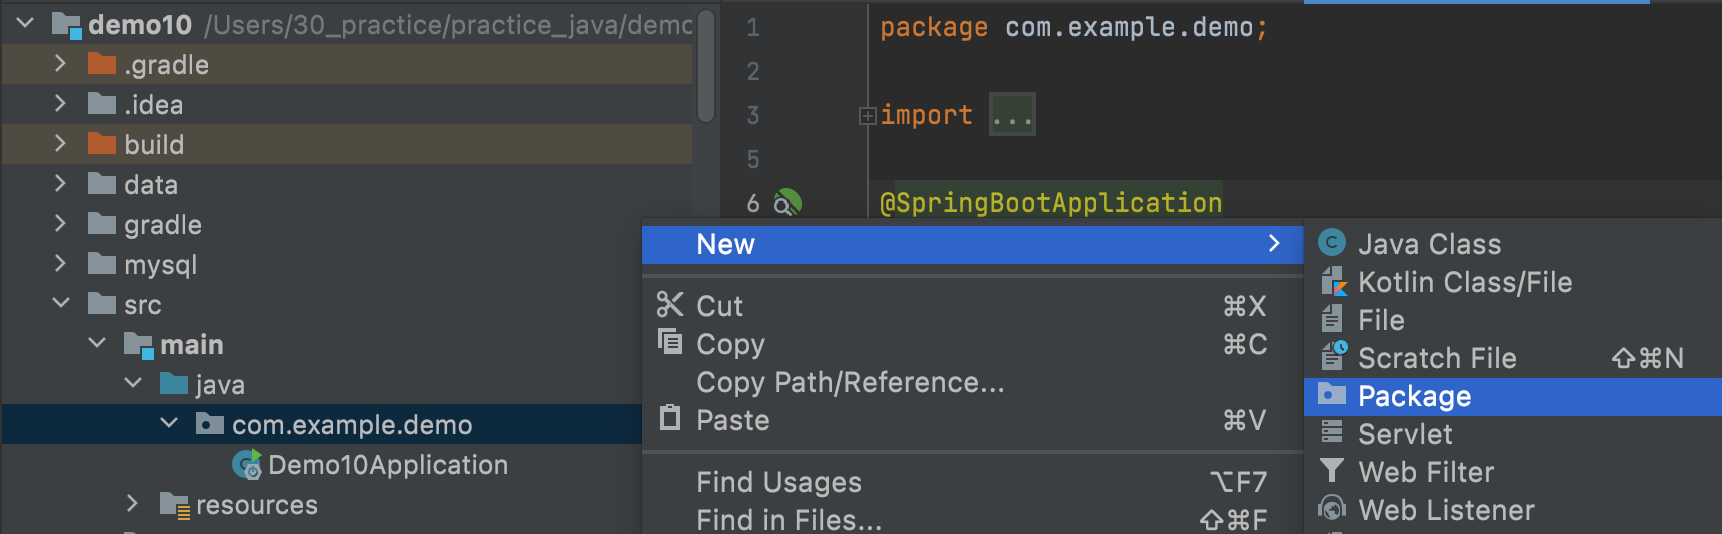
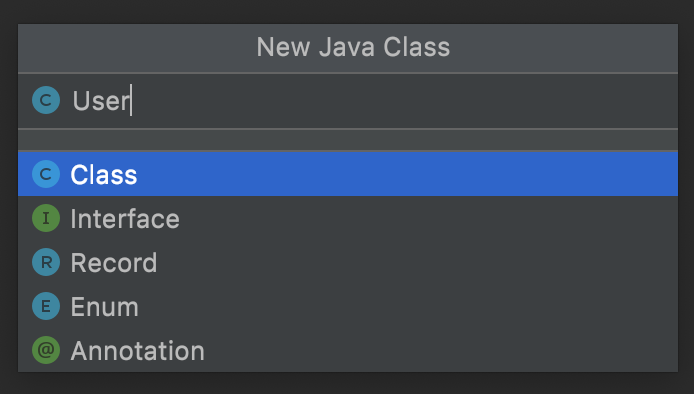
モデル(エンティティ)クラス 作成
以下のパッケージを作成して、DBテーブルの内容のモデル(エンティティ)クラスを配置します。
com.example.demo.model

User クラス
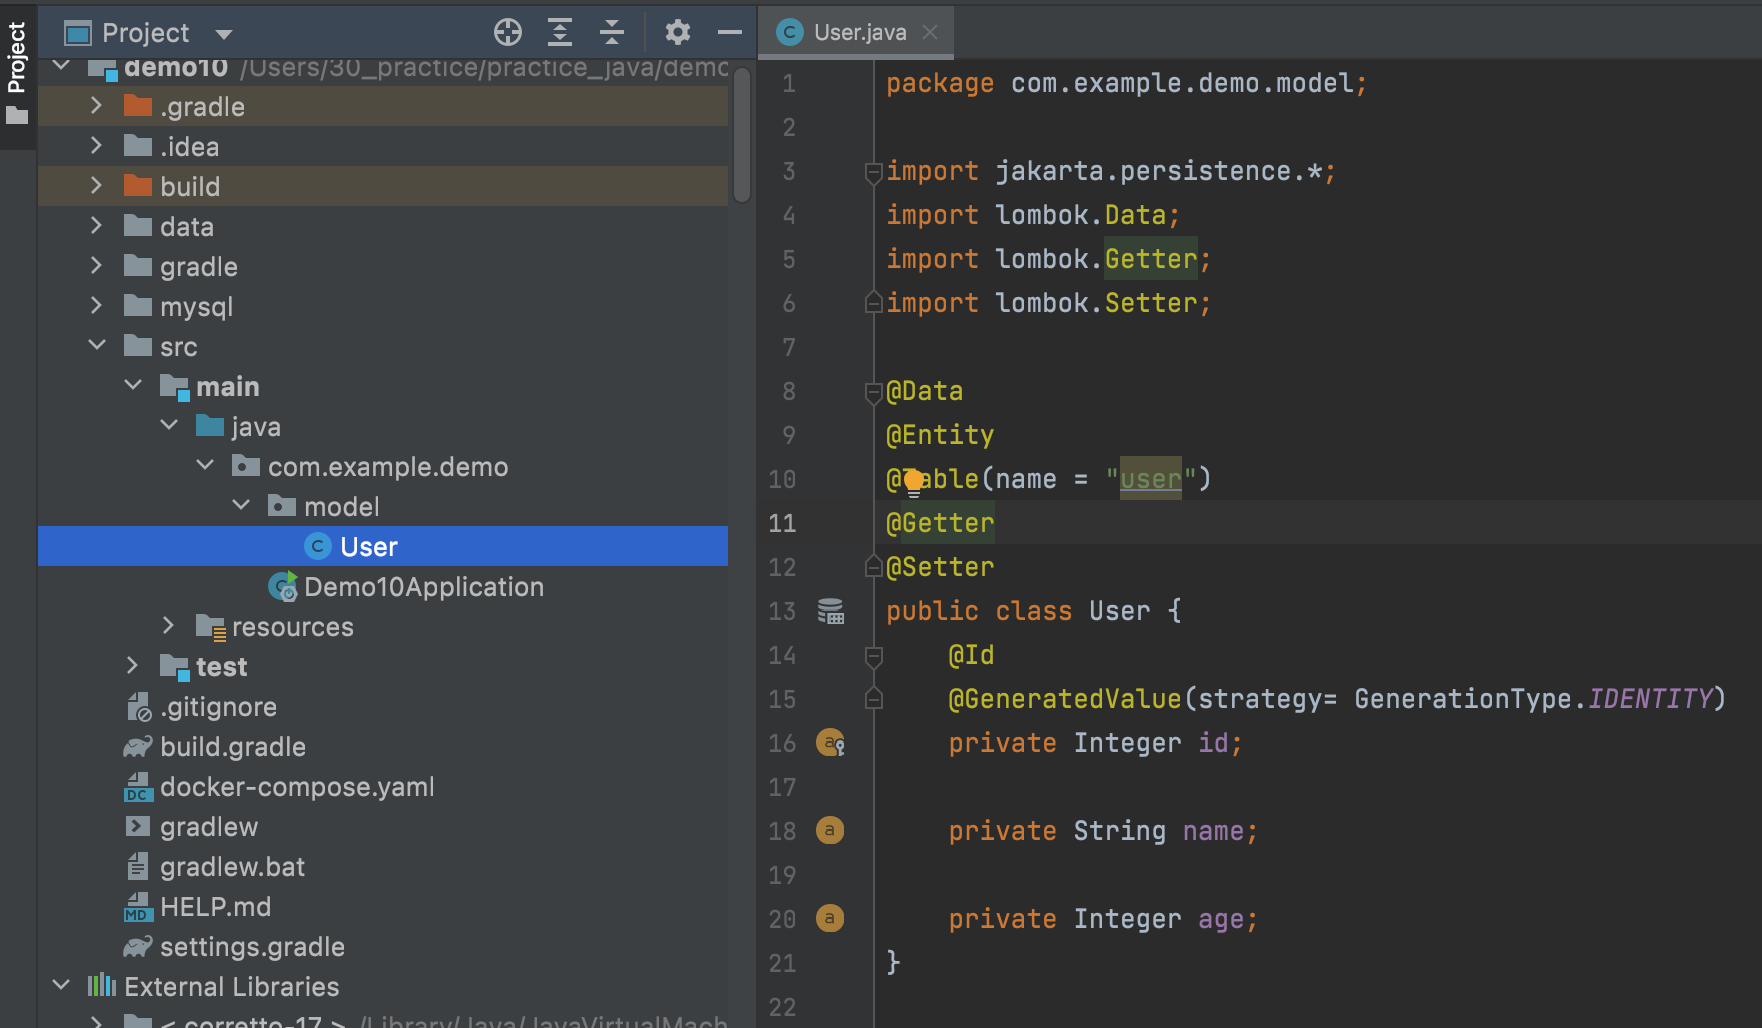
package com.example.demo.model;

import jakarta.persistence.*;
import lombok.Data;
import lombok.Getter;
import lombok.Setter;

@Data
@Entity
@Table(name = "user")
@Getter
@Setter
public class User {
    @Id
    @GeneratedValue(strategy= GenerationType.IDENTITY)
    private Integer id;

    private String name;

    private int age;
}
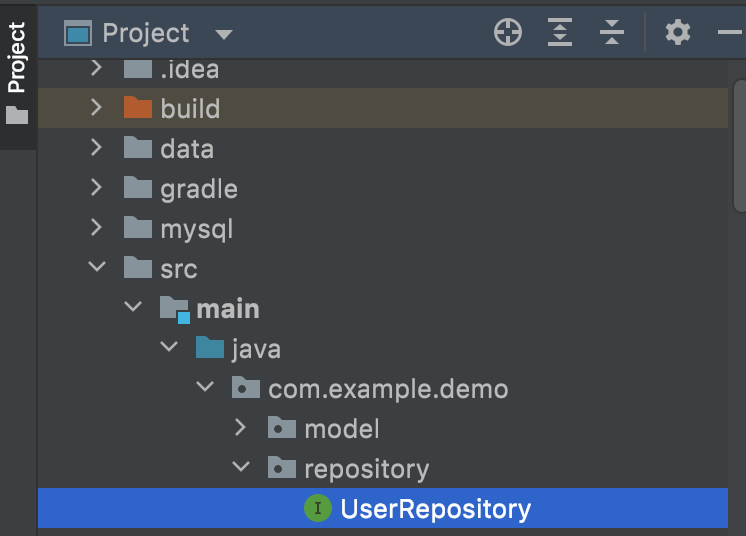
Repositoryインターフェース 作成
以下のパッケージを作成して、Repositoryインターフェースを配置します。
com.example.demo.repository
UserRepository インターフェース
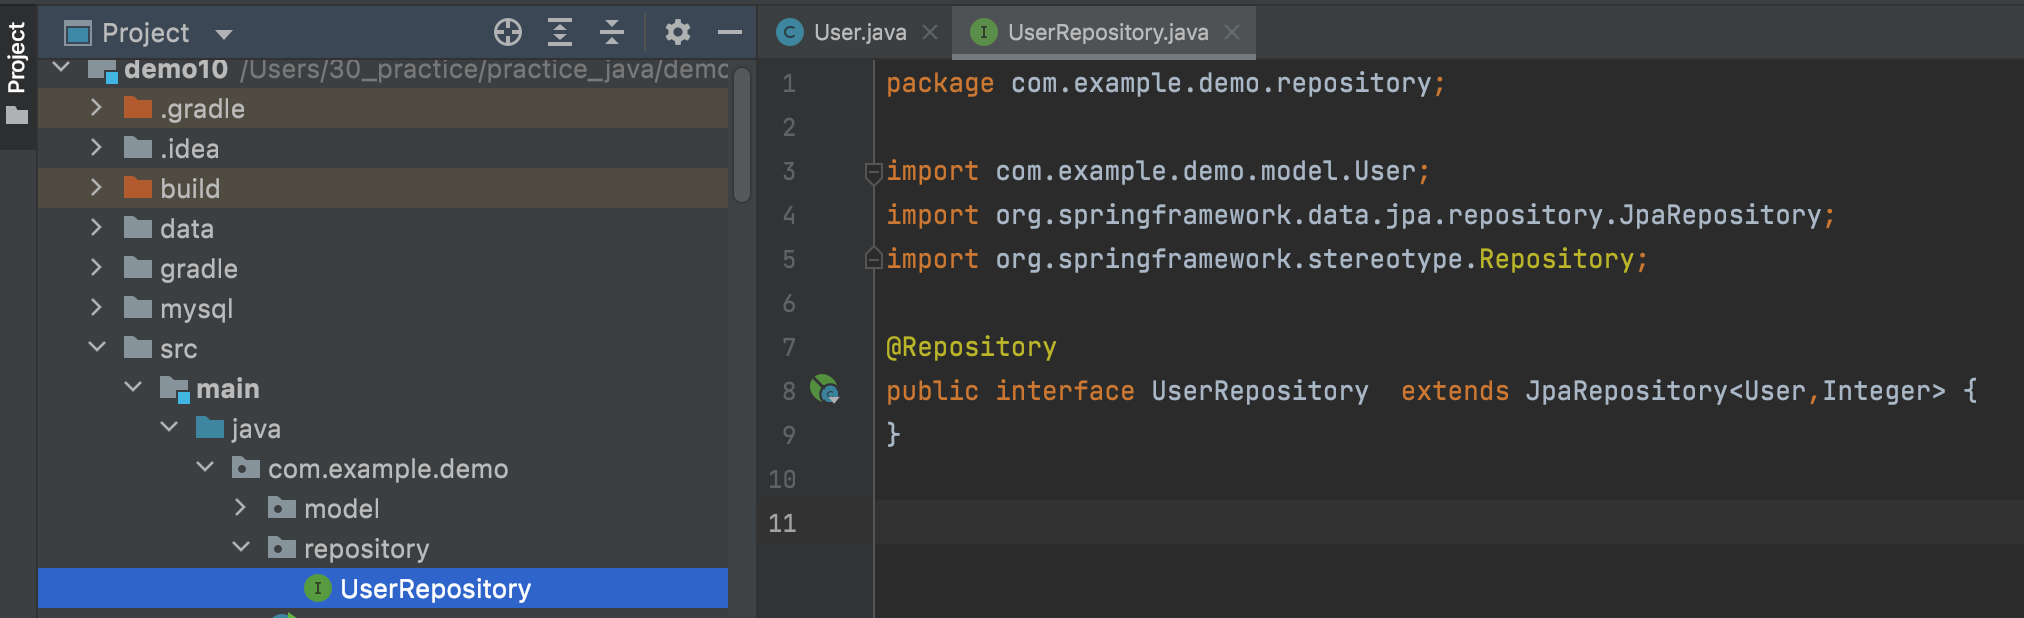
package com.example.demo.repository;

import com.example.demo.model.User;
import org.springframework.data.jpa.repository.JpaRepository;
import org.springframework.stereotype.Repository;

@Repository public interface UserRepository extends JpaRepository<User,Integer> { }
Serviceクラス 作成
以下のパッケージを作成して、Serviceクラスを配置します。
com.example.demo.service
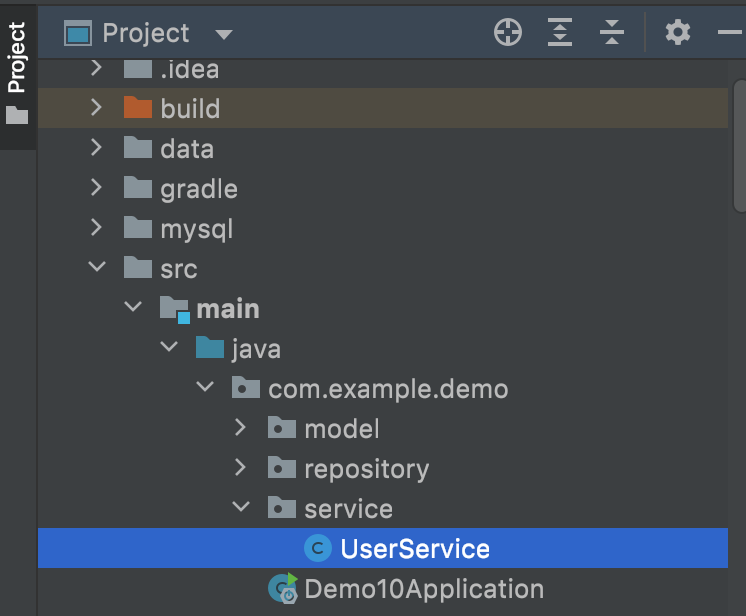
UserService クラス
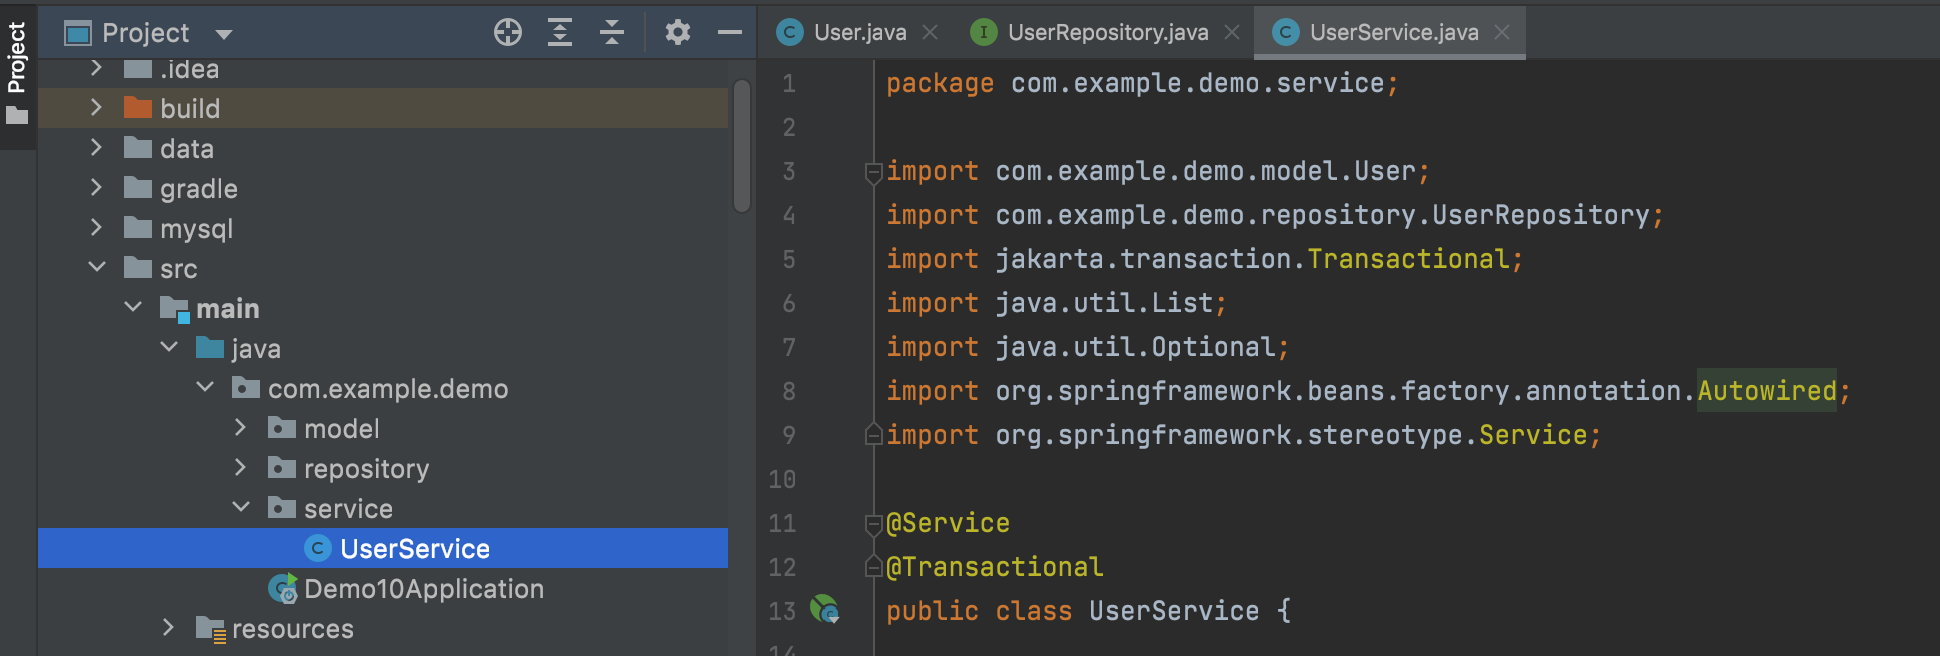
package com.example.demo.service;

import com.example.demo.model.User;
import com.example.demo.repository.UserRepository;
import jakarta.transaction.Transactional;
import java.util.List;
import java.util.Optional;
import org.springframework.beans.factory.annotation.Autowired;
import org.springframework.stereotype.Service;

@Service
@Transactional
public class UserService {

    @Autowired
    UserRepository repository;

    public List<User> findAll() {
        return repository.findAll();
    }

    public Optional<User> findById(final Integer id) {
        return repository.findById(id);
    }
}
ThymeLeaf テンプレート 作成
プロジェクトルート/src/resources/templatesに、
入力画面と結果画面用のテンプレートhtmlを作成します。

selectUser.html
<!DOCTYPE html>
<html xmlns:th="http://www.thymeleaf.org">
<head>
<meta http-equiv="Content-Type" content="text/html; charset=UTF-8"/>
<title>MySQLデータ表示サンプル(selectUser.html)</title>
</head>
<body>
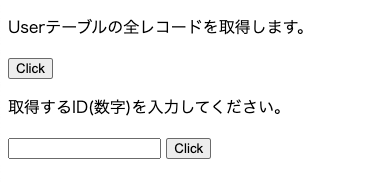
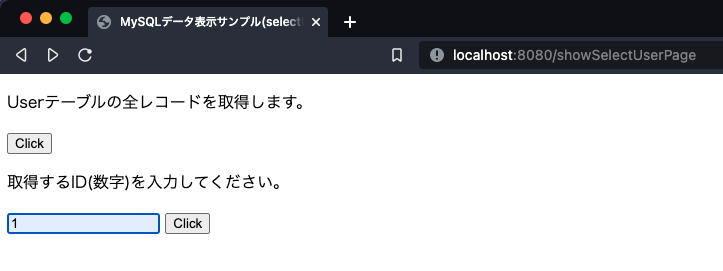
<p>Userテーブルの全レコードを取得します。</p>
<form method="post" action="selectUserAll">
<input type="submit" value="Click"/>
</form>
<p>取得するID(数字)を入力してください。</p>
<form method="post" action="selectUserById">
<input type="text" name="userId" th:value="${value}"/>
<input type="submit" value="Click"/>
</form>
</body>
</html>以下のような入力画面を作成します。
selectUserResult.html
<!DOCTYPE html>
<html xmlns:th="http://www.thymeleaf.org">
<head>
<meta http-equiv="Content-Type" content="text/html; charset=UTF-8"/>
<title>MySQLデータ表示サンプル(selectUserResult.html)</title>
</head>
<body>
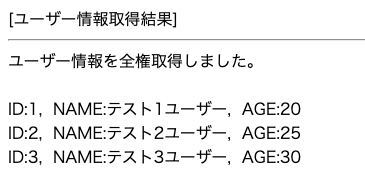
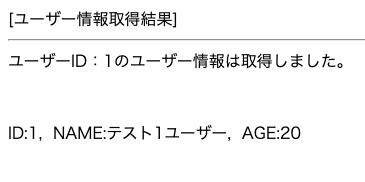
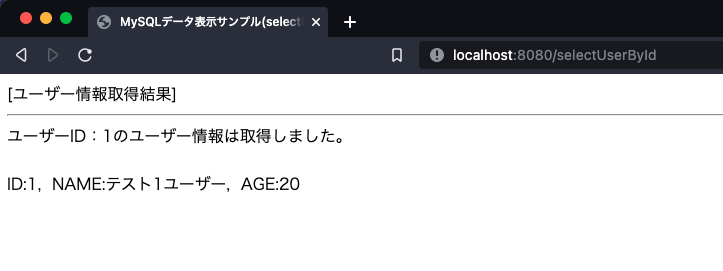
[ユーザー情報取得結果]<br />
<hr />
<!-- メッセージを表示 -->
<div th:text="${msg}"></div><br />
<!-- 全権表示ボタンが押されて、対象データが存在する場合表示 -->
<tr th:each="user : ${userList}">
ID:<td th:text="${user.id}"></td>,
NAME:<td th:text="${user.name}"></td>,
AGE:<td th:text="${user.age}"></td>
<br />
</tr>
<!-- ユーザーID指定ボタンが押されて、対象データが存在する場合表示 -->
<tr th:if="${#objects.nullSafe(findUser, false)}" th:object="${findUser}">
ID:<td th:text="*{id}"></td>,
NAME:<td th:text="*{name}"></td>,
AGE:<td th:text="*{age}"></td>
<br />
</tr>
</body>
</html>以下のような結果画面を実装します。
全件表示
ID指定表示
参考
https://www.thymeleaf.org/doc/tutorials/3.0/usingthymeleaf_ja.html#6 繰り返し処理
https://www.thymeleaf.org/doc/tutorials/3.0/usingthymeleaf_ja.html#7 条件の評価
コントローラクラス 作成
以下のパッケージを作成して、コントローラクラスを配置します。
com.example.demo
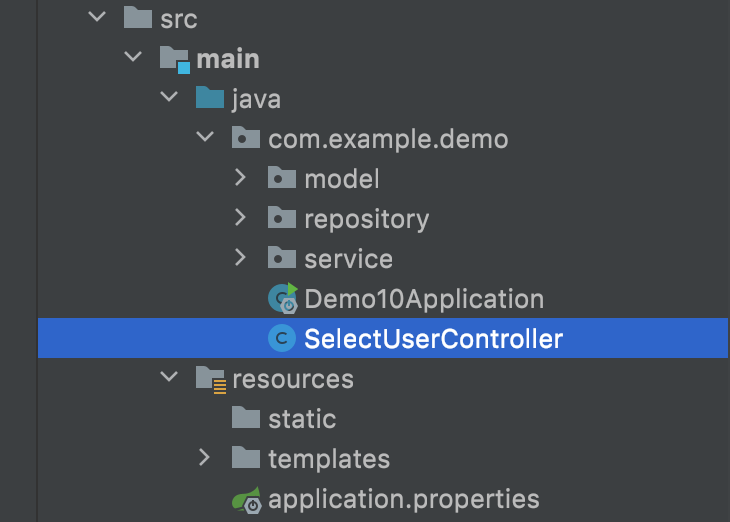
SelectUserController クラス
package com.example.demo;

import com.example.demo.model.User;
import com.example.demo.service.UserService;
import java.util.List;
import java.util.Optional;
import org.springframework.beans.factory.annotation.Autowired;
import org.springframework.web.bind.annotation.RequestMapping;
import org.springframework.web.bind.annotation.RequestMethod;
import org.springframework.web.bind.annotation.RequestParam;
import org.springframework.web.bind.annotation.RestController;
import org.springframework.web.servlet.ModelAndView;

@RestController
public class SelectUserController {
    @Autowired
    UserService service;

    @RequestMapping(path = "/showSelectUserPage", method = RequestMethod.GET)
    public ModelAndView showSelectUserPage(final ModelAndView mav) {
        mav.setViewName("selectUser"); // テンプレートHTML指定
        return mav;
    }

    @RequestMapping(value = "/selectUserAll", method = RequestMethod.POST)
    public ModelAndView selectUserAll(final ModelAndView mav) {
        // テンプレートHTML指定
        mav.setViewName("selectUserResult");
        // ユーザー情報取得
        final List<User> users = service.findAll();
        // 表示メッセージ設定
        mav.addObject("msg", "ユーザー情報を全権取得しました。");
        // 取得したユーザー情報を設定
        mav.addObject("userList", users);
        return mav;
    }

    @RequestMapping(value = "/selectUserById", method = RequestMethod.POST)
    public ModelAndView selectUserById(@RequestParam("userId") final Integer userId, final ModelAndView mav) {
        // テンプレートHTML指定
        mav.setViewName("selectUserResult");
        // ユーザー情報取得
        final Optional<User> userOptional = service.findById(userId);
        userOptional.ifPresentOrElse(
            // 指定されたIDのユーザーが存在する場合
            (findUser) -> {
                // 取得したユーザー情報を設定
                mav.addObject("findUser", findUser);
                // 表示メッセージ設定
                mav.addObject("msg", "ユーザーID:" + userId + "のユーザー情報は取得しました。");
            },
            // 指定されたIDのユーザーが存在しない場合
            () -> mav.addObject("msg", "ユーザーID:" + userId + "のユーザー情報は存在しません。")
        );
        return mav;
    }
}
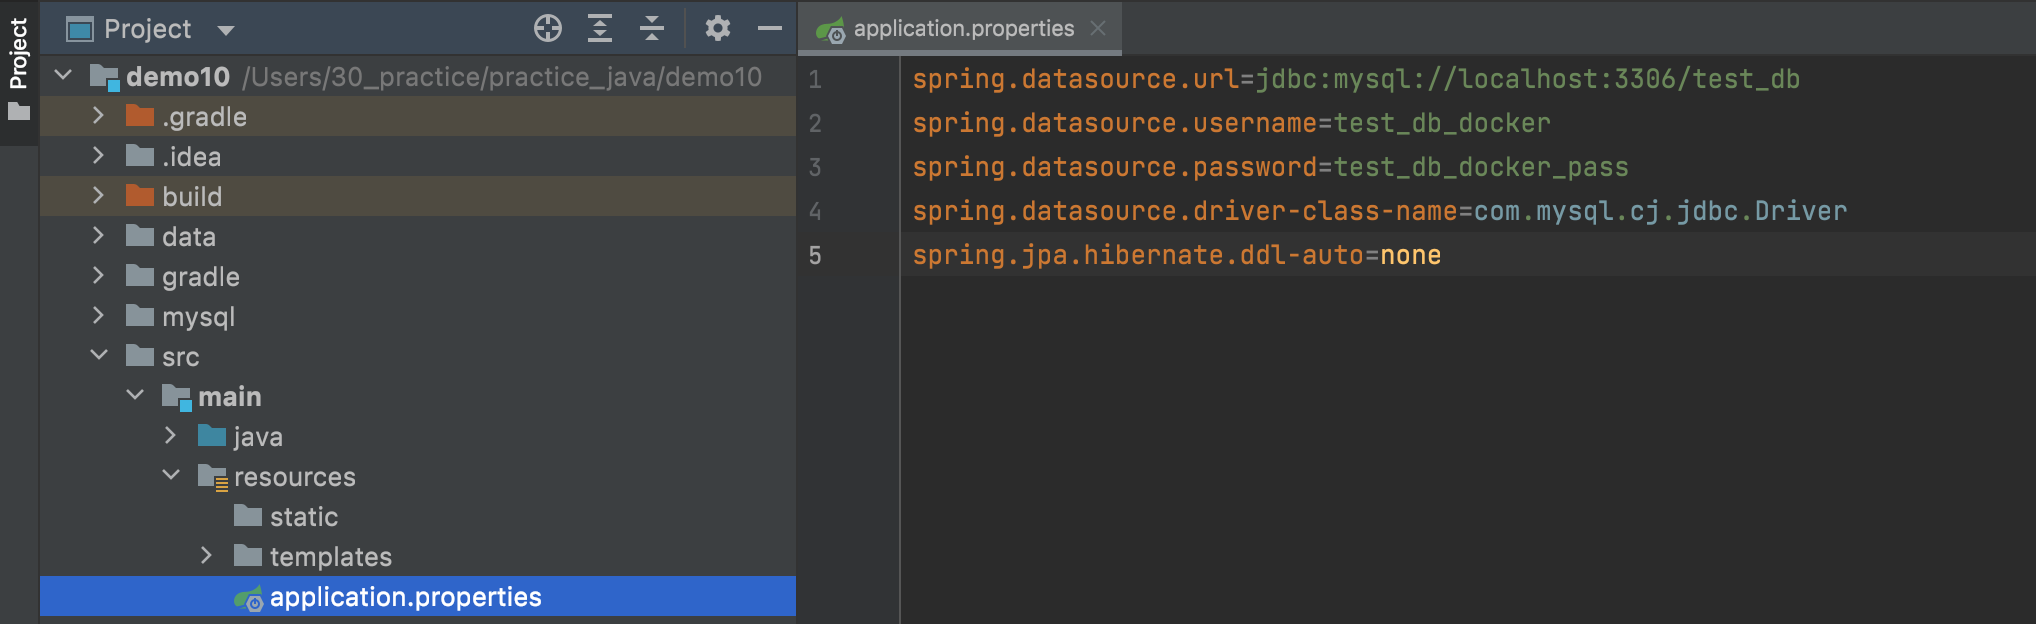
Application.properties ファイル編集
設定ファイルApplication.propertiesに、DB接続情報を記述します。
プロジェクトルート/src/resources/application.properties
spring.datasource.url=jdbc:mysql://localhost:3306/test_db
spring.datasource.username=test_db_docker
spring.datasource.password=test_db_docker_pass
spring.datasource.driver-class-name=com.mysql.cj.jdbc.Driver
spring.jpa.hibernate.ddl-auto=none
実行・挙動確認
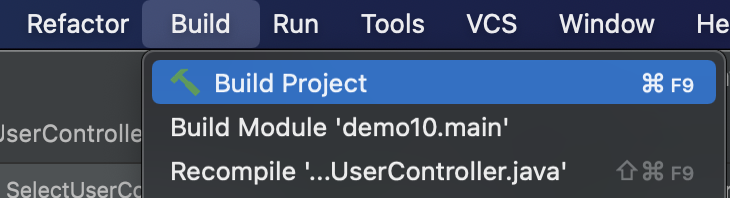
念のため、プロジェクトのビルドを行います。
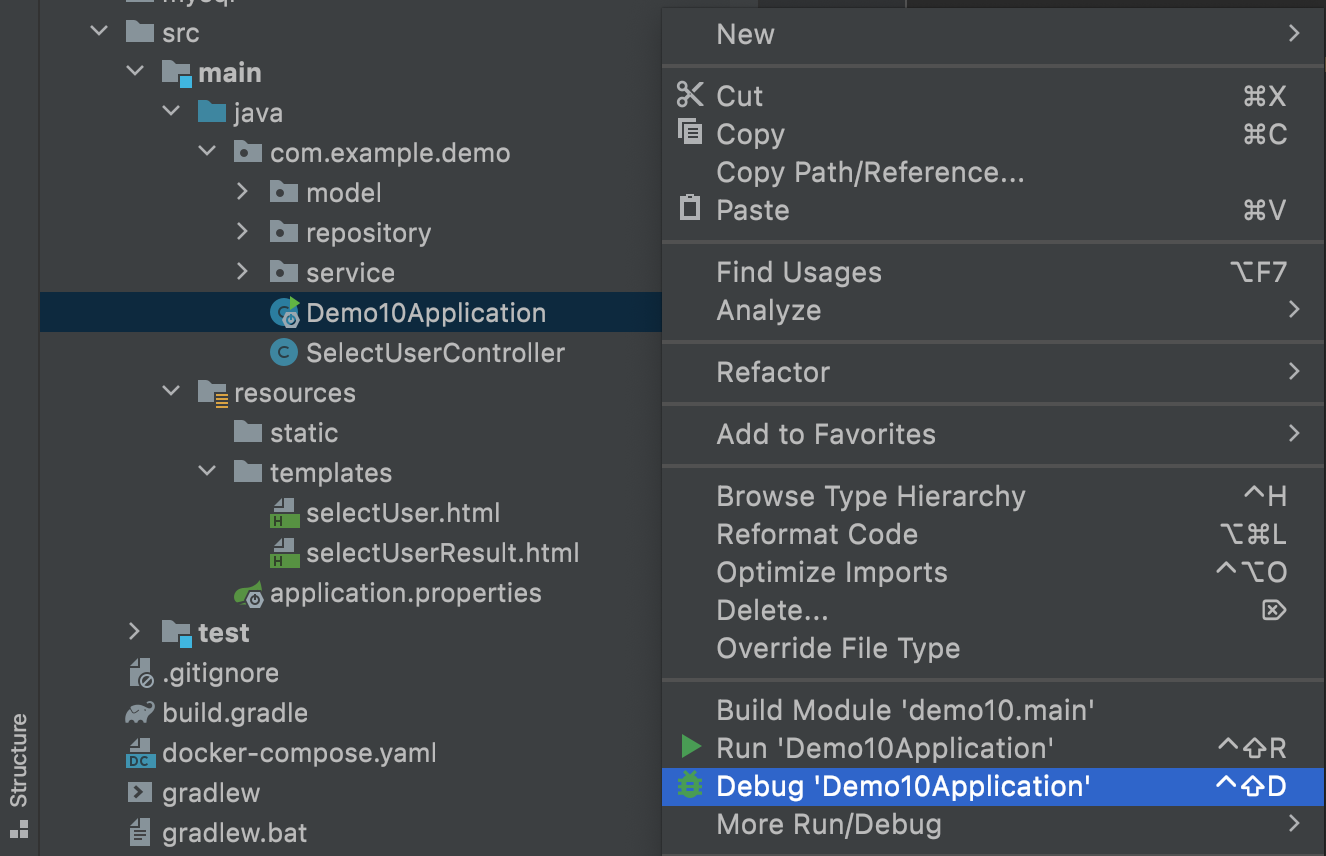
Demo10Applicationを選択して、右クリックメニューより、
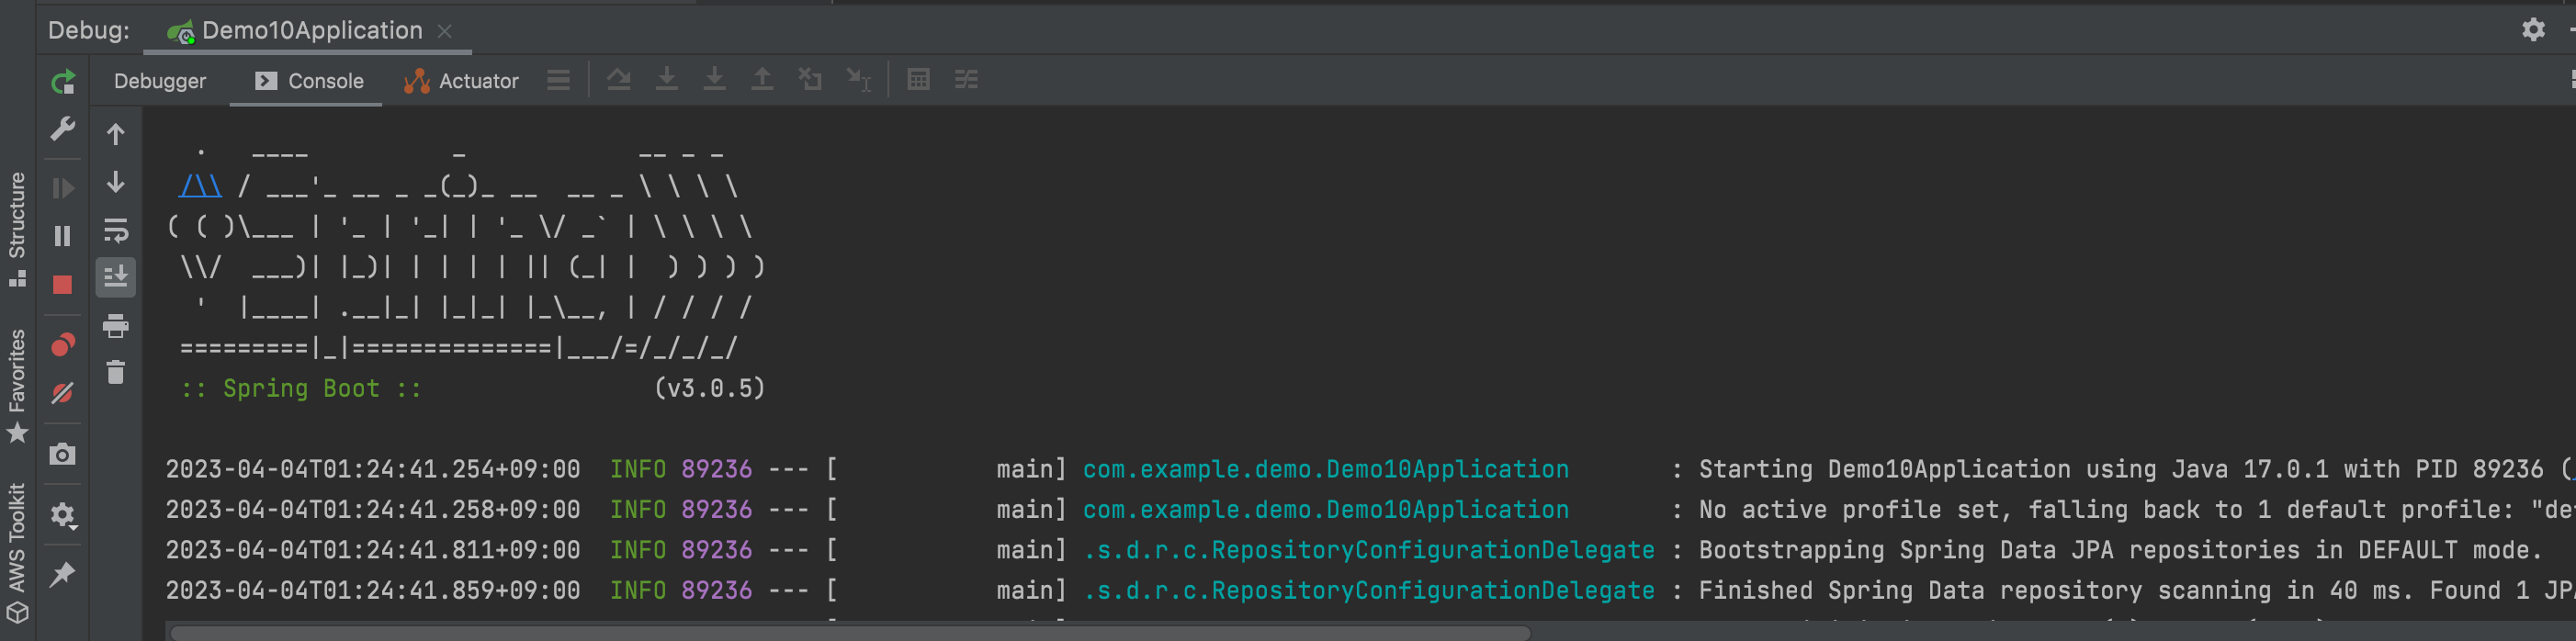
Runもしくは、Debugをクリックします。
※プログラムをステップ実行したい場合は、Debugにします。
デフォルトの場合以下のURLでアクセスを行います。
http://localhost:8080/showSelectUserPage


今回のメモは以上となります。
今回の内容は、以下の私のGoogleDriveに配置されています。ご自由に取得下さい。
https://drive.google.com/file/d/1TV67J9yq6vmQCJutpV1JZuIr9LfOgepV/view?usp=share_link