
今回は、PowerShellで簡単なGUIアプリを作成するメモです。
ps1ファイルのままでもGUI動作できますが、
今回はps2exeというツールを利用してexeファイルも作成してみます。
https://www.powershellgallery.com/packages/ps2exe/1.0.16
https://github.com/MScholtes/PS2EXE
目次
環境
PowerShell:5.1.26100.4061
VSCode:1.1012
Windows11:24H2 OSビルド:26100.4061
実行ポリシーを設定
PowerShellを始めて実行する場合は、実行ポリシーを設定する必要があります。
exe化したアプリの動作では不要ですが、その前にPowerShellの状態で正しく動作していることを確認するために設定します。
まず、PowerShell画面を管理者権限で開きます。
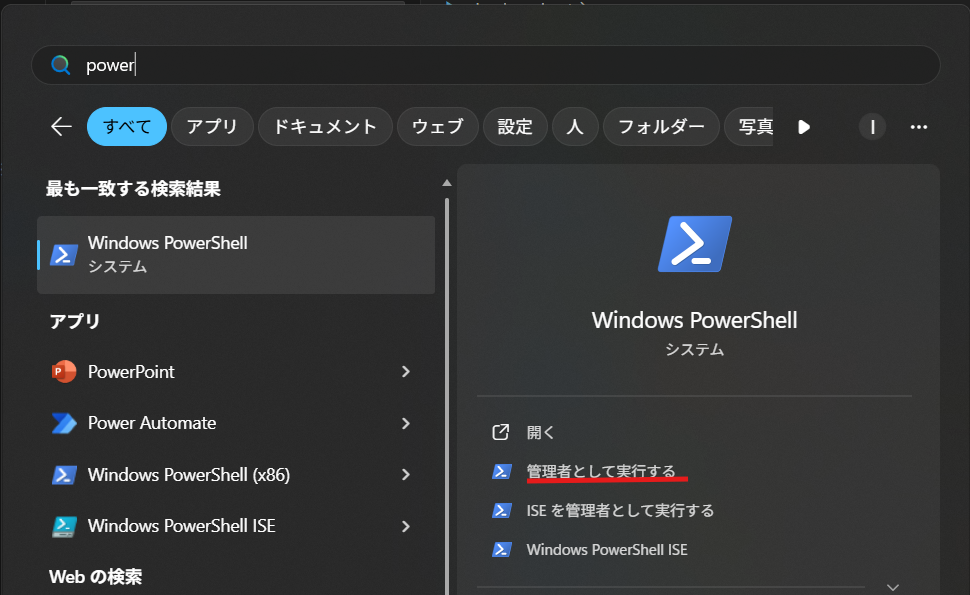
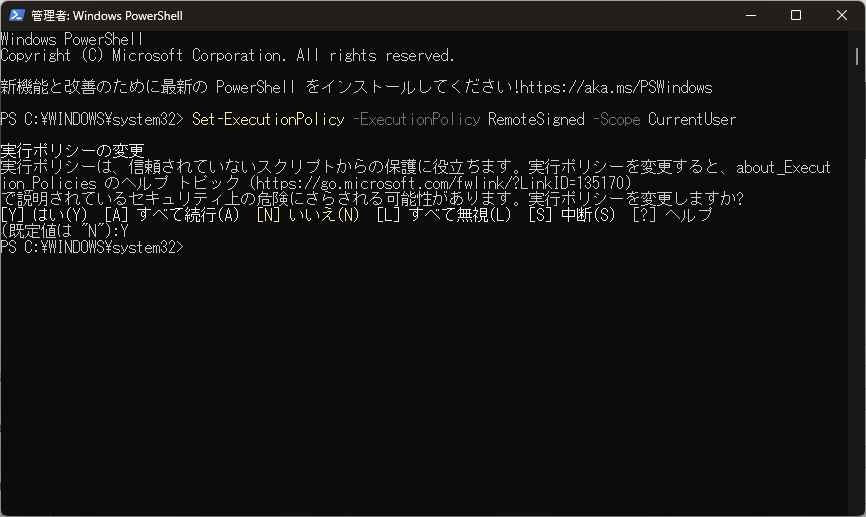
以下コマンドを実行して、ポリシーを設定します。
Set-ExecutionPolicy -ExecutionPolicy RemoteSigned -Scope CurrentUser確認メッセージが表示されたら、Yを入力して実行します。
PowerShell GUIサンプル実装
簡単なGUIアプリを実装します。
# PowerShell Windows Forms GUI サンプル
Add-Type -AssemblyName System.Windows.Forms
Add-Type -AssemblyName System.Drawing


# フォームの作成
$form = New-Object System.Windows.Forms.Form
$form.Text = "PowerShell GUI サンプル"
$form.Size = New-Object System.Drawing.Size(400, 300)
$form.StartPosition = "CenterScreen"
$form.BackColor = [System.Drawing.Color]::LightBlue


# ラベルの作成
$label = New-Object System.Windows.Forms.Label
$label.Location = New-Object System.Drawing.Point(50, 30)
$label.Size = New-Object System.Drawing.Size(300, 20)
$label.Text = "名前を入力してください:"
$label.Font = New-Object System.Drawing.Font("MS Gothic", 10)
$form.Controls.Add($label)


# テキストボックスの作成
$textBox = New-Object System.Windows.Forms.TextBox
$textBox.Location = New-Object System.Drawing.Point(50, 60)
$textBox.Size = New-Object System.Drawing.Size(200, 25)
$textBox.Font = New-Object System.Drawing.Font("MS Gothic", 10)


# Enterキーで入力できるようにする
$textBox.Add_KeyDown({
    if ($_.KeyCode -eq [System.Windows.Forms.Keys]::Enter) {
        $button.PerformClick()
    }
})


$form.Controls.Add($textBox)


# ボタンの作成
$button = New-Object System.Windows.Forms.Button
$button.Location = New-Object System.Drawing.Point(260, 55)
$button.Size = New-Object System.Drawing.Size(100, 30)
$button.Text = "入力"
$button.BackColor = [System.Drawing.Color]::LightGreen
$button.Font = New-Object System.Drawing.Font("MS Gothic", 10)


# 入力値を表示するリストボックスの作成
$listBox = New-Object System.Windows.Forms.ListBox
$listBox.Location = New-Object System.Drawing.Point(50, 100)
$listBox.Size = New-Object System.Drawing.Size(200, 100)
$listBox.Font = New-Object System.Drawing.Font("MS Gothic", 9)
$form.Controls.Add($listBox)


# 削除ボタンの作成
$deleteButton = New-Object System.Windows.Forms.Button
$deleteButton.Location = New-Object System.Drawing.Point(260, 100)
$deleteButton.Size = New-Object System.Drawing.Size(80, 30)
$deleteButton.Text = "削除"
$deleteButton.BackColor = [System.Drawing.Color]::LightPink
$deleteButton.Font = New-Object System.Drawing.Font("MS Gothic", 10)


# 削除ボタンクリックイベント
$deleteButton.Add_Click({
    if ($listBox.SelectedIndex -ge 0) {
        $listBox.Items.RemoveAt($listBox.SelectedIndex)
    } else {
        [System.Windows.Forms.MessageBox]::Show("削除する項目を選択してください。", "エラー", [System.Windows.Forms.MessageBoxButtons]::OK, [System.Windows.Forms.MessageBoxIcon]::Warning)
    }
})


$form.Controls.Add($deleteButton)


# ボタンクリックイベント
$button.Add_Click({
    $name = $textBox.Text
    if ($name -eq "") {
        [System.Windows.Forms.MessageBox]::Show("名前を入力してください。", "エラー", [System.Windows.Forms.MessageBoxButtons]::OK, [System.Windows.Forms.MessageBoxIcon]::Warning)
    } else {
        # リストボックスに名前を追加
        $listBox.Items.Add($name)
        # テキストボックスをクリア
        $textBox.Text = ""
        # テキストボックスにフォーカスを戻す
        $textBox.Focus()
    }
})


$form.Controls.Add($button)


# 終了ボタン
$exitButton = New-Object System.Windows.Forms.Button
$exitButton.Location = New-Object System.Drawing.Point(50, 220)
$exitButton.Size = New-Object System.Drawing.Size(300, 30)
$exitButton.Text = "終了"
$exitButton.BackColor = [System.Drawing.Color]::LightCoral
$exitButton.Font = New-Object System.Drawing.Font("MS Gothic", 10)


$exitButton.Add_Click({
    $form.Close()
})


$form.Controls.Add($exitButton)


# フォームの表示
$form.ShowDialog()
以下のコマンドで実行確認します。
.\simple_gui.ps1PS2EXEのインストール
作成したPowerShellアプリをexe化するために、ps2exeをインストールします。
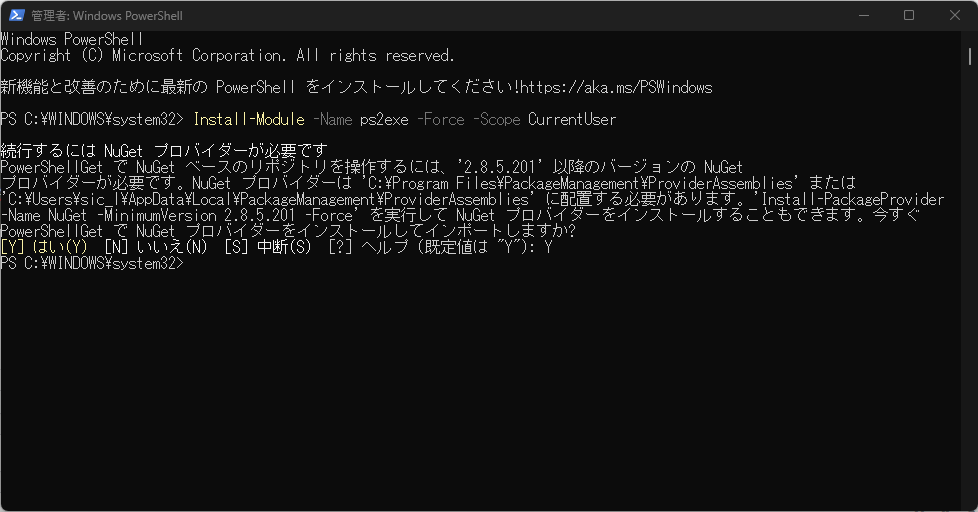
先ほどのように、管理者権限でPowerShellのウインドウを起動して、
以下コマンドを実行します。
以下コマンドを実行します。
Install-Module -Name ps2exe -Force -Scope CurrentUser先ほどと同様に確認が表示されたら、Yを入力してインストールを完了します。
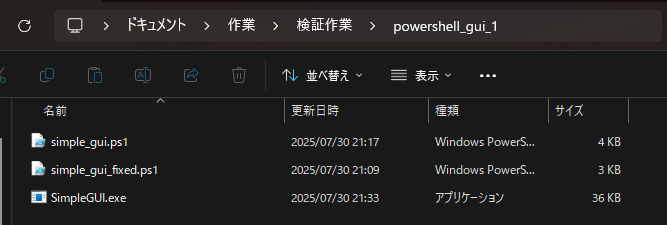
EXE作成
ps2exeをインストール出来たら、以下の要領でexeファイルを作成します。
ps2exe -inputFile ファイルパス/ファイル名 -outputFile 出力先パス/ファイル名.exe -noConsole -title "プロパティタイトル"- -inputFile:対象ファイルのパス/ファイル名
- -outputFile:出力先パス/ファイル名.exe
- -noConsole:アプリ実行時にコンソールを非表示にする。
-
–title:プロパティに表示する文言
- -version:バージョン表記
※参考:https://github.com/MScholtes/PS2EXE?tab=readme-ov-file#parameter

今回のメモは以上となります。
PowerShellのままでも動作可能ですが、
PowerShellの動作制限がある環境などでも動作可能になりますし、配布が簡単になります。
ちょっとした作業用ツールであれば、
PowerShellのGUIでも重宝しますのでおススメです。