今回は、Google Authenticatorを利用してMFA認証を実装するメモとなります。
SpringBootを利用したWebベースでの実装内容になっています。
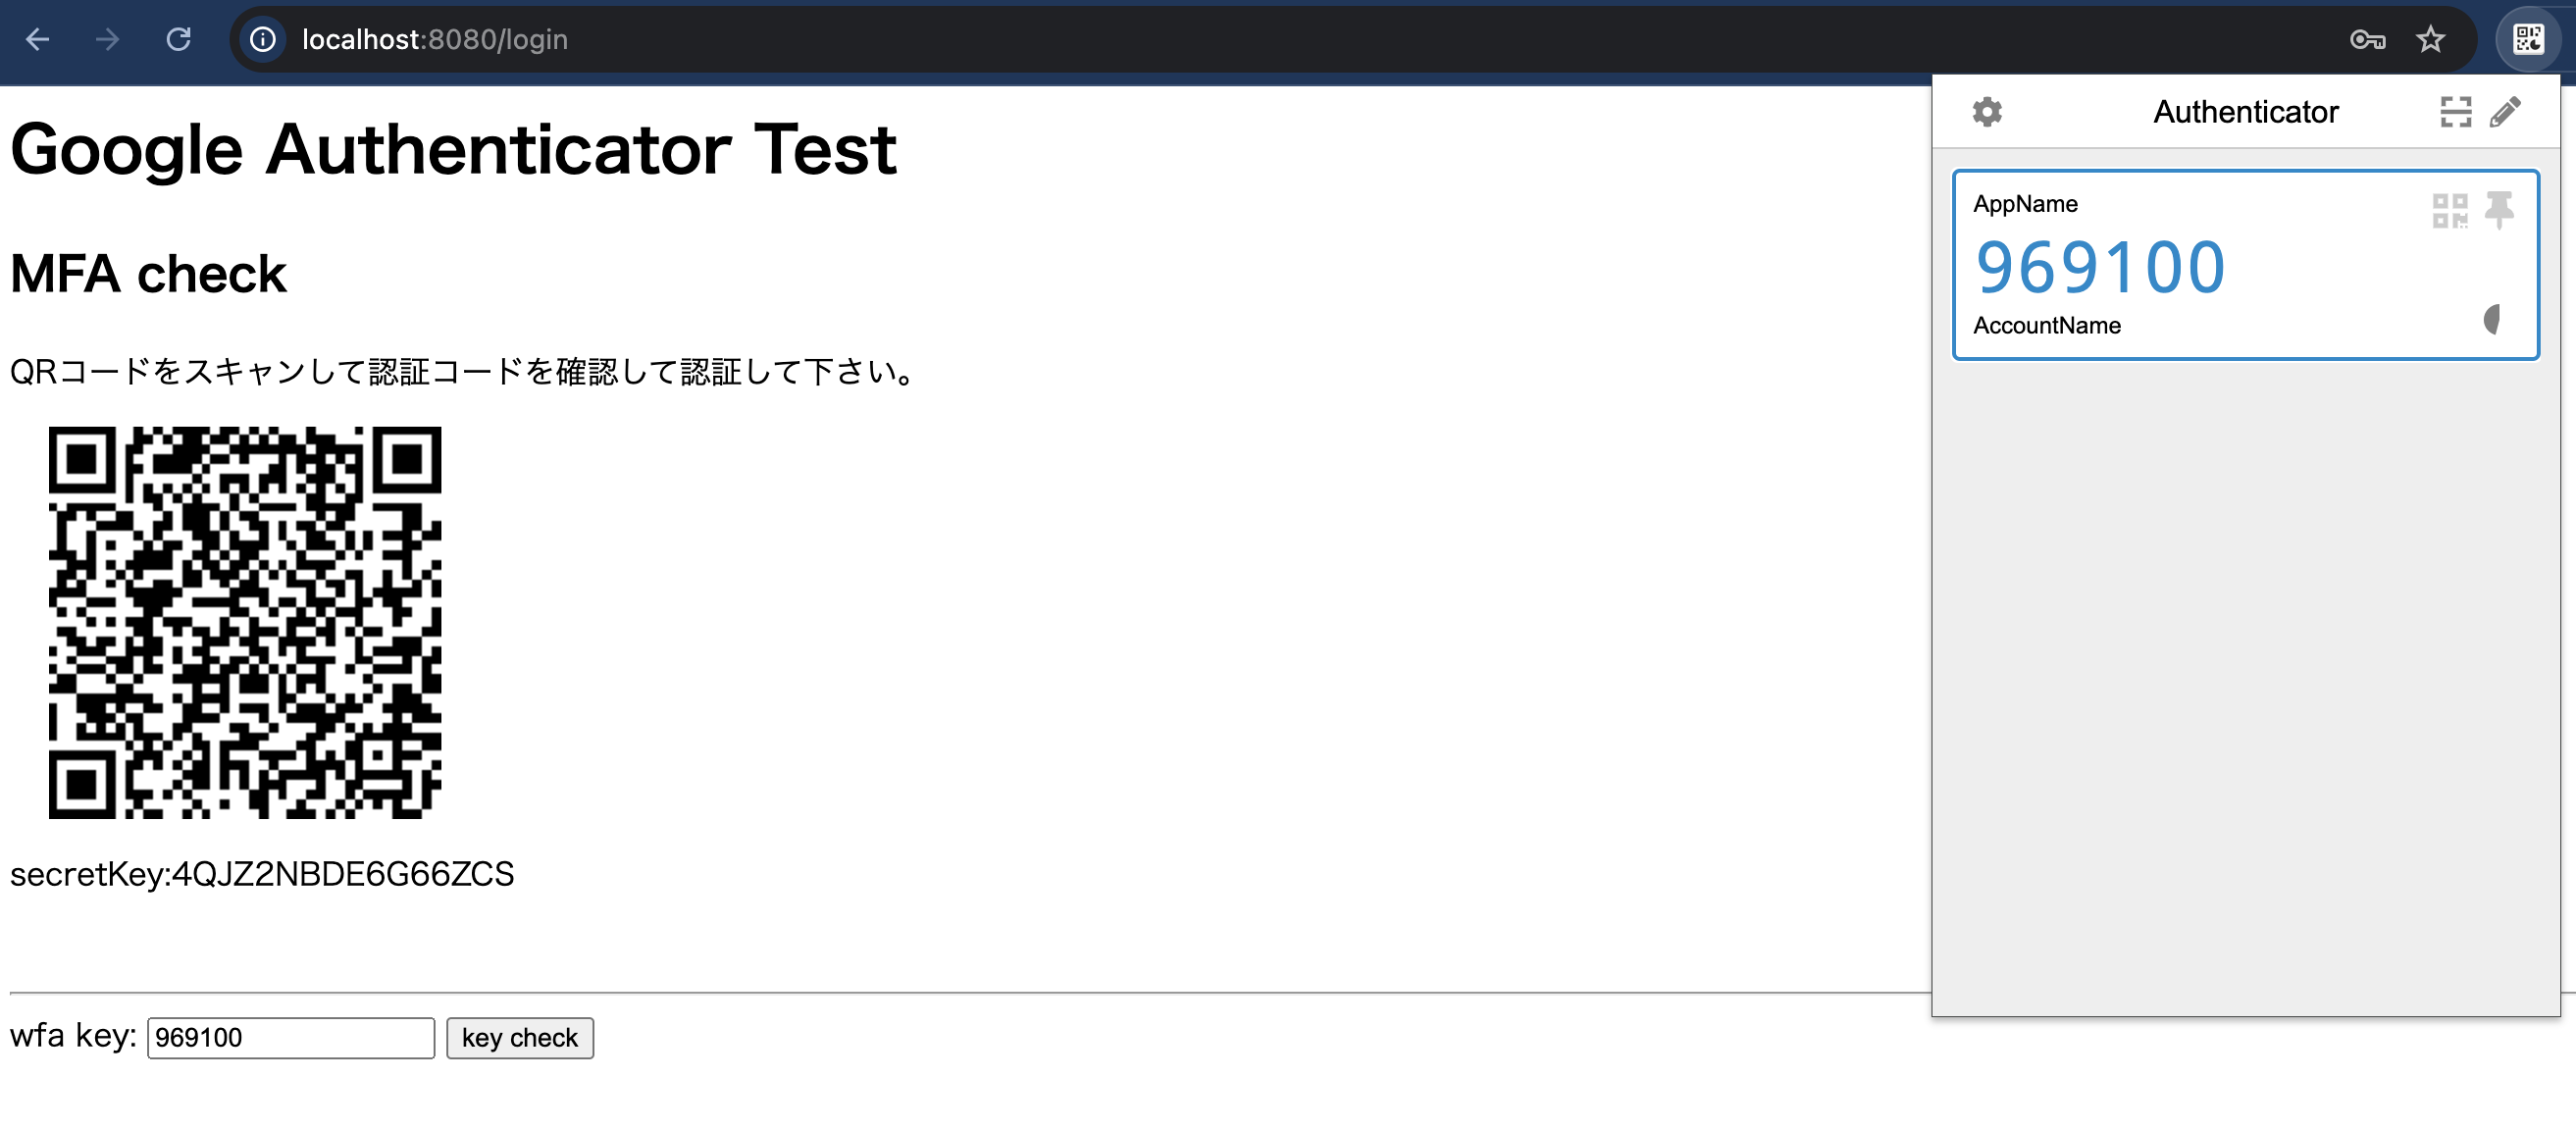
ログイン後の画面に、QRコード表示を行い認証アプリで認証コードを取得できる様にして、
認証コードでの認証をできる様にする内容になっています。
https://github.com/wstrange/GoogleAuth/tree/master
目次
検証環境・バージョン
- MacOS:Sonoma 14.6
- Amazon Corretto:17
- SpringBoot:3.4.0
- IntelliJ IDEA:2024.2 (Ultimate Edition)
ビルド設定(Gradle・Maven)
・Gradle
implementation 'com.warrenstrange:googleauth:1.4.0'・Maven
<dependency>
    <groupId>com.warrenstrange</groupId>
    <artifactId>googleauth</artifactId>
    <version>1.4.0</version>
</dependency>
・build.gradle例
plugins {
    id 'java'
    id 'org.springframework.boot' version '3.4.0'
    id 'io.spring.dependency-management' version '1.1.6'
}

group = 'example.com'
version = '0.0.1-SNAPSHOT'

java {
    toolchain {
        languageVersion = JavaLanguageVersion.of(17)
    }
}

repositories {
    mavenCentral()
}

dependencies {
    implementation 'org.springframework.boot:spring-boot-starter-thymeleaf'
    implementation 'org.springframework.boot:spring-boot-starter-web'

    implementation 'com.warrenstrange:googleauth:1.4.0'

    testImplementation 'org.springframework.boot:spring-boot-starter-test'
    testRuntimeOnly 'org.junit.platform:junit-platform-launcher'
}

tasks.named('test') {
    useJUnitPlatform()
}
実装
QRコード表示
・サーバーサイド
// Generate a secret key
final GoogleAuthenticatorKey key = gAuth.createCredentials();
// Generate QR code URL
final String qrCodeUrl = GoogleAuthenticatorQRGenerator.getOtpAuthURL("AppName", "AccountName", key);

// show the QR code URL
final ModelAndView modelAndView = new ModelAndView();
modelAndView.setViewName("mfa_form");
modelAndView.addObject("qrCodeUrl", qrCodeUrl);
GoogleAuthenticatorKeyを作成し、GoogleAuthenticatorQRGenerator.getOtpAuthURL(String issuer, String accountName, GoogleAuthenticatorKey credentials)で、QRコードURLを作成します。
getOtpAuthURLの第一引数に指定した文字列が、認証アプリ上でアプリ名として表示され、
第二引数で指定された文字列がユーザ名として表示されます。
尚、もしもQRコード表示をせずにメール等で認証コードを送信したい場合、以下の要領で発行できます。
// This is a sample secret key. You should generate a random secret key.
final String fixedSecret = hardcodedUsername + "_01";
// Create a new secret key
final GoogleAuthenticatorKey key = new GoogleAuthenticatorKey.Builder(fixedSecret).build();
// Get the verification code
final int verificationCode = gAuth.getTotpPassword(fixedSecret);
・フロントエンド
<div>
    <p>QRコードをスキャンして認証コードを確認して認証して下さい。</p>
    <img th:src="@{${qrCodeUrl}}" alt="QR Code"/>
</div>
コード認証処理
・サーバーサイド
@PostMapping("/verifyMfa")
public ModelAndView verifyMfa(@RequestParam final String wfaCode, @RequestParam final String secretKey) {
    final ModelAndView modelAndView = new ModelAndView();
    final boolean isCodeValid = gAuth.authorize(secretKey, Integer.parseInt(wfaCode));
    if (isCodeValid) {
        modelAndView.setViewName("mfa_ok");
    } else {
        modelAndView.setViewName("mfa_form");
        // Generate QR code URL
        final GoogleAuthenticatorKey recreatedKey = new GoogleAuthenticatorKey.Builder(secretKey).build();
        final String qrCodeUrl = GoogleAuthenticatorQRGenerator.getOtpAuthURL("AppName", "AccountName",recreatedKey);
        modelAndView.addObject("qrCodeUrl", qrCodeUrl);
        modelAndView.addObject("secretKey", recreatedKey.getKey());
        modelAndView.addObject("error", "Invalid WFA key!");
    }
    return modelAndView;
}
GoogleAuthenticator().authorize(String secret, int verificationCode)で、認証コードチェックを行います。
・フロントエンド
<form th:action="@{/verifyMfa}" method="post">
    <label for="wfaCode">wfa key:</label>
    <input type="text" id="wfaCode" name="wfaCode"/>
    <input type="hidden" name="secretKey" th:value="${secretKey}"/>
    <button type="submit">key check</button>
</form>
・コントローラー全体像
package example.com.googleauthenticator.controller;

import com.warrenstrange.googleauth.GoogleAuthenticator;
import com.warrenstrange.googleauth.GoogleAuthenticatorKey;
import com.warrenstrange.googleauth.GoogleAuthenticatorQRGenerator;
import org.springframework.stereotype.Controller;
import org.springframework.web.bind.annotation.GetMapping;
import org.springframework.web.bind.annotation.PostMapping;
import org.springframework.web.bind.annotation.RequestParam;
import org.springframework.web.servlet.ModelAndView;

@Controller
public class MfaSampleController {

    private final GoogleAuthenticator gAuth = new GoogleAuthenticator();

    @GetMapping("/")
    public ModelAndView index() {
        final ModelAndView modelAndView = new ModelAndView();
        modelAndView.setViewName("index");
        return modelAndView;
    }

    @PostMapping("/login")
    public ModelAndView login(@RequestParam final String id, @RequestParam final String password) {
        final ModelAndView modelAndView = new ModelAndView();
        final String hardcodedId = "sample";
        final String hardcodedPassword = "pass";
        if (id.equals(hardcodedId) && hardcodedPassword.equals(password)) {
            // Generate a secret key
            final GoogleAuthenticatorKey secretKey = gAuth.createCredentials();
            // Generate QR code URL
            final String qrCodeUrl = GoogleAuthenticatorQRGenerator.getOtpAuthURL("AppName", "AccountName", secretKey);
            // show the QR code URL
            modelAndView.setViewName("mfa_form");
            modelAndView.addObject("qrCodeUrl", qrCodeUrl);
            modelAndView.addObject("secretKey", secretKey.getKey());
        } else {
            modelAndView.setViewName("index");
            modelAndView.addObject("message", "Invalid password");
        }
        return modelAndView;
    }

    @PostMapping("/verifyMfa")
    public ModelAndView verifyMfa(@RequestParam final String wfaCode, @RequestParam final String secretKey) {
        final ModelAndView modelAndView = new ModelAndView();
        final boolean isCodeValid = gAuth.authorize(secretKey, Integer.parseInt(wfaCode));
        if (isCodeValid) {
            modelAndView.setViewName("mfa_ok");
        } else {
            modelAndView.setViewName("mfa_form");
            // Generate QR code URL
            final GoogleAuthenticatorKey recreatedKey = new GoogleAuthenticatorKey.Builder(secretKey).build();
            final String qrCodeUrl = GoogleAuthenticatorQRGenerator.getOtpAuthURL("AppName", "AccountName",recreatedKey);
            modelAndView.addObject("qrCodeUrl", qrCodeUrl);
            modelAndView.addObject("secretKey", recreatedKey.getKey());
            modelAndView.addObject("error", "Invalid WFA key!");
        }
        return modelAndView;
    }
}
・フロントエンド全体像
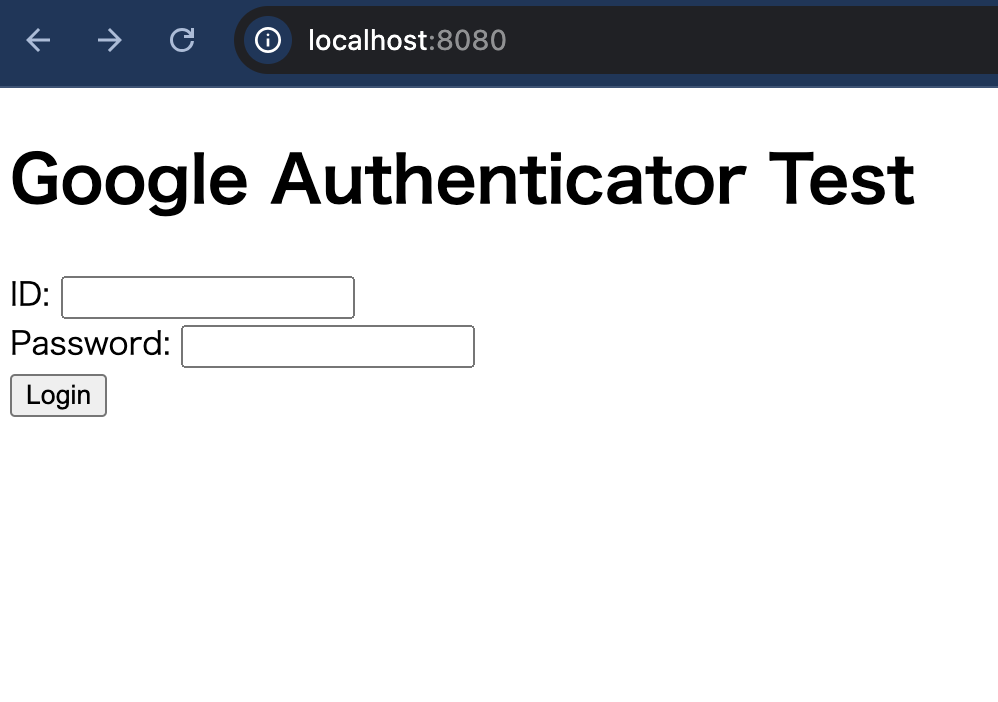
index.html ログイン画面
<!DOCTYPE html>
<html lang="en">
<head>
    <meta charset="UTF-8">
    <title>Google Authenticator Test</title>
</head>
<body>
<h1>Google Authenticator Test</h1>

<form action="/login" method="post">
    ID: <input type="text" name="id" required><br>
    Password: <input type="password" name="password" required><br>
    <button type="submit">Login</button>
</form>

</body>
</html>
mfa_form.html MFA認証フォーム
<html xmlns:th="https://www.thymeleaf.org">
<head>
    <title>Google Authenticator Test</title>
</head>
<body>
<h1>Google Authenticator Test</h1>
<h2>MFA check</h2>
<div>
    <p>QRコードをスキャンして認証コードを確認して認証して下さい。</p>
    <img th:src="@{${qrCodeUrl}}" alt="QR Code" style="margin-left: 20px;"/>
    <p>
        <label>secretKey:</label><span th:text="${secretKey}"></span>
    </p>
</div>
<br>
<hr>

<th:block th:if="${error}">
    <div style="color: red;">認証コードが間違っています。</div>
</th:block>

<form th:action="@{/verifyMfa}" method="post">
    <label for="wfaCode">wfa key:</label>
    <input type="text" id="wfaCode" name="wfaCode"/>
    <input type="hidden" name="secretKey" th:value="${secretKey}"/>
    <button type="submit">key check</button>
</form>
</body>
</html>
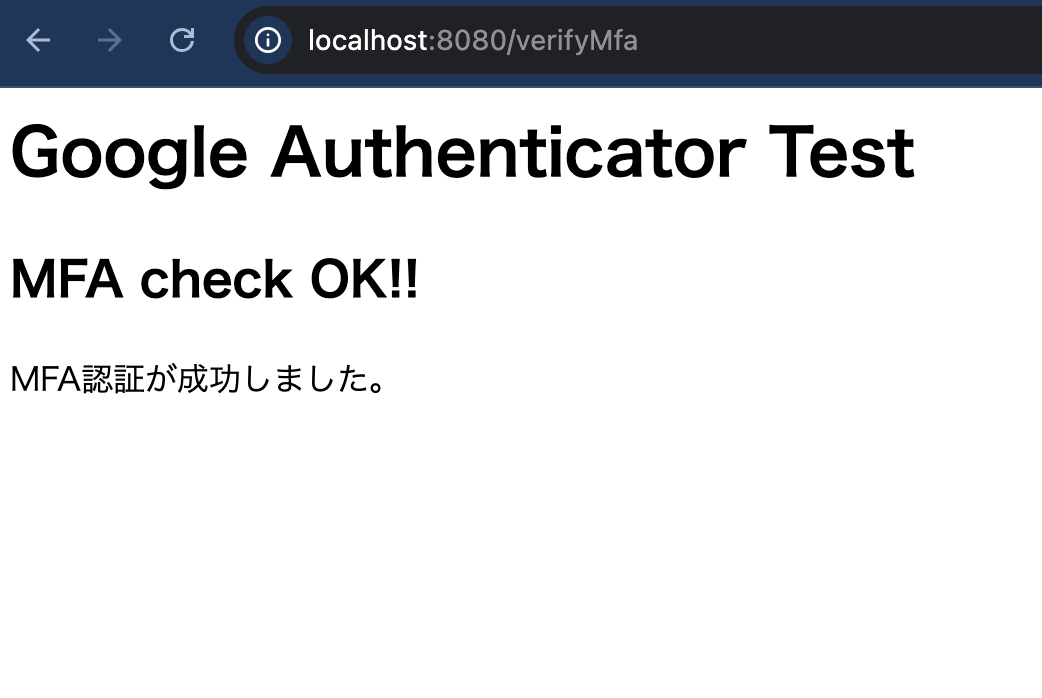
mfa_ok.html MFA認証後画面
<html xmlns:th="https://www.thymeleaf.org">
<head>
    <title>Google Authenticator Test</title>
</head>
<body>
<h1>Google Authenticator Test</h1>
<h2>MFA check OK!!</h2>
<div>MFA認証が成功しました。</div>
</body>
</html>
補足
尚、シークレットキーを自身で決めたい場合や、
シークレットキーを指定してQRコードを作成したい場合は、
GoogleAuthenticatorKey.Builder(String value)の引数に指定することで対応できます。
// Generate a secret key
final GoogleAuthenticatorKey secretKey = new GoogleAuthenticatorKey.Builder(id).build();
// Generate QR code URL
final String qrCodeUrl = GoogleAuthenticatorQRGenerator.getOtpAuthURL("AppName", "AccountName", secretKey);挙動確認
簡易的なログインを行います。
 画面に表示したQRコードを認証アプリで読み込み、
確認した認証コードでチェックを行います。
認証キーが正しく有効であれば、画面遷移します。
ライセンスについて
GoogleAuthenticatorは、現時点では三条項BSDライセンス(修正BSDライセンス)です。
使用する際にはライセンス変更がないか確認してください。
https://github.com/wstrange/GoogleAuth/blob/master/LICENSE
商用利用可能ですが原本に記載されている通り、使用する場合以下を守る必要があります。
- ソースコードを再頒布する場合、上記の著作権表示、本条件一覧、および下記免責条項を含めること。
- バイナリ形式で再頒布する場合、頒布物に付属のドキュメント等の資料に、
上記の著作権表示、本条件一覧、および下記免責条項を含めること。 - 書面による特別の許可なしに、本ソフトウェアから派生した製品の宣伝または販売促進に、
<組織> の名前またはコントリビューターの名前を使用してはならない。
原本
- https://opensource.org/licenses/BSD-3-Clause (英語)
- https://licenses.opensource.jp/BSD-3-Clause/BSD-3-Clause.html (日本語)
今回のメモは以上です。
GoogleAuthenticatorはインフラなどの用意も必要なく実装できるため、非常に便利です。
ライセンスも緩く商用利用可能な制限なので、
色々な案件で利用できると思います。


